In this tutorial, we will guide you through the process of creating an AlertDialog with a TextField in Flutter. This is a useful technique to have in your toolkit, as alert dialogs are an effective way of communicating important messages to your users. With the addition of a text field, you can even gather input from your users and use it to make decisions in your application.
Creating an alert dialog with a text field may seem daunting at first, but with Flutter’s powerful framework and intuitive API, it is actually quite simple. So, let’s get started and learn how to create an alert dialog with a text field in Flutter!
Creating AlertDialog
If you are looking to create an alert dialog with a single text field in Flutter, the basic code structure is relatively straightforward. The code to create an AlertDialog widget with a single TextField would look something like this:
AlertDialog(
        title: Text('TextField in Dialog'),
        content: TextField(
          onChanged: (value) { },
          controller: _textFieldController,
          decoration: InputDecoration(hintText: "Text Field in Dialog"),
        ),
    ),
To make the above code snippet functional and present an alert dialog to the user, we need to wrap it inside a function that we can call later on in our code. This is an important step to ensure that our code is well-organized and easy to read, as well as reusable in different parts of our application.
Let’s create a function called showTextFieldDialog() that will present the alert dialog with a single text field to the user. Here is an example of how we can define this function:
Future<void> _displayTextInputDialog(BuildContext context) async {
  return showDialog(
      context: context,
      builder: (context) {
        return AlertDialog(
          title: Text('TextField in Dialog'),
          content: TextField(
            onChanged: (value) {

            },
            controller: _textFieldController,
            decoration: InputDecoration(hintText: "Text Field in Dialog"),
          ),

        );
      });
}
One important aspect of the previous code snippet is the use of a Text Editing Controller for the editable text field in the alert dialog. The controller property is set to _textFieldController, which is an instance of the TextEditingController class. This controller is responsible for tracking any changes made to the text field and notifying its listeners accordingly. Additionally, it can be used to provide an initial value to the text field.
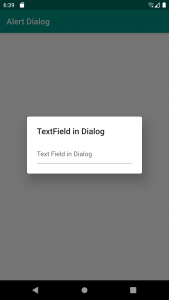
In the full example below, you will see how this controller is used to create a more functional alert dialog with a text field. As you can see in the image, simply displaying the text field in the alert dialog is not enough to make it useful in our application. We need to add functionality to handle the user input.
Fortunately, the actions property of the alert dialog provides a convenient way to handle events triggered by the user. We can define a list of MaterialButton widgets that will be displayed at the bottom of the alert dialog. Each MaterialButton can be given a label and an onPressed callback that will be triggered when the button is pressed.
Handle Events
Now that we have added a MaterialButton to our alert dialog, we need to define what happens when it is pressed. This is where the onPressed event comes into play. When the button is tapped, the onPressed event will be triggered, allowing us to capture and store the value entered in the TextField as a String. Here’s a code snippet that demonstrates how to handle the onPressed event:
Future<void> _displayTextInputDialog(BuildContext context) async {
  return showDialog(
      context: context,
      builder: (context) {
        return AlertDialog(
          title: Text('TextField in Dialog'),
          content: TextField(
            onChanged: (value) {
              setState(() {
                valueText = value;
              });
            },
            controller: _textFieldController,
            decoration: InputDecoration(hintText: "Text Field in Dialog"),
          ),
          actions: <Widget>[
            MaterialButton(
              color: Colors.green,
              textColor: Colors.white,
              child: Text('OK'),
              onPressed: () {
                setState(() {
                  codeDialog = valueText;
                  Navigator.pop(context);
                });
              },
            ),
          ],
        );
      });
}
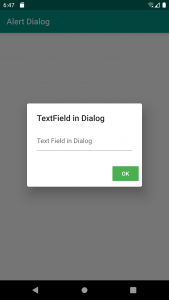
If you run the code snippet above, the alert window will look like the one in the picture below.
Adding a Cancel Button
To enhance our app’s user experience, it is crucial to incorporate a Cancel button to dismiss an alert window. When a user taps the Cancel button, we need to handle the event effectively to close the alert window. In Flutter, the Navigator object offers a simple way to achieve this functionality. We can implement this by calling the pop(context) function on the Navigator object when the user taps on the Cancel button, and this will automatically dismiss the alert window. This way, we can ensure our app provides a seamless and intuitive experience for users, helping us retain and attract more users. As always, it’s important to test the implementation thoroughly to ensure it meets the required functionality and user experience.
Navigator.pop(context);
Below is a code example of how it is done in the app code.

Complete Code Example
Now that we have discussed different code snippets separately let’s put everything into one complete app code example.
import 'package:flutter/material.dart';

void main() {
  runApp(const MyApp());
}

class MyApp extends StatelessWidget {
  const MyApp({super.key});

  @override
  Widget build(BuildContext context) {
    return MaterialApp(
      debugShowCheckedModeBanner: false,
      title: 'Alert Dialog',
      theme: ThemeData(
        primarySwatch: Colors.blue,
      ),
      home: const MyHomePage(title: 'Alert Dialog'),
    );
  }
}

class MyHomePage extends StatefulWidget {
  const MyHomePage({Key? key, this.title}) : super(key: key);
  final String? title;
  @override
  _MyHomePageState createState() => _MyHomePageState();
}

class _MyHomePageState extends State<MyHomePage> {
  final TextEditingController _textFieldController = TextEditingController();
  Future<void> _displayTextInputDialog(BuildContext context) async {
    return showDialog(
        context: context,
        builder: (context) {
          return AlertDialog(
            title: const Text('TextField in Dialog'),
            content: TextField(
              onChanged: (value) {
                setState(() {
                  valueText = value;
                });
              },
              controller: _textFieldController,
              decoration:
                  const InputDecoration(hintText: "Text Field in Dialog"),
            ),
            actions: <Widget>[
              MaterialButton(
                color: Colors.red,
                textColor: Colors.white,
                child: const Text('CANCEL'),
                onPressed: () {
                  setState(() {
                    Navigator.pop(context);
                  });
                },
              ),
              MaterialButton(
                color: Colors.green,
                textColor: Colors.white,
                child: const Text('OK'),
                onPressed: () {
                  setState(() {
                    codeDialog = valueText;
                    Navigator.pop(context);
                  });
                },
              ),
            ],
          );
        });
  }

  String? codeDialog;
  String? valueText;
  @override
  Widget build(BuildContext context) {
    return Scaffold(
      backgroundColor: (codeDialog == "123456") ? Colors.green : Colors.white,
      appBar: AppBar(
        backgroundColor: Colors.teal,
        title: const Text('Alert Dialog'),
      ),
      body: Center(
        child: MaterialButton(
          color: Colors.teal,
          textColor: Colors.white,
          onPressed: () {
            _displayTextInputDialog(context);
          },
          child: const Text('Press For Alert'),
        ),
      ),
    );
  }
}
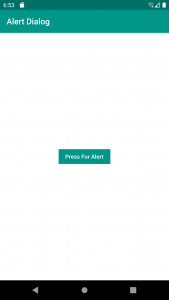
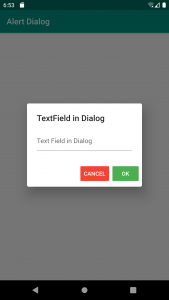
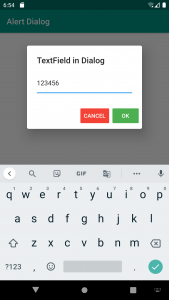
If you build and run the above code example on Android Emulator, the will look and work as illustrated in the images below.
When an alert window is presented and the user inputs and submits “123456”, then the background colour will turn green, otherwise, it will turn white.

I hope this Flutter tutorial is helpful to you. If you are interested in learning Flutter, please check other Flutter tutorials on this site. Some of them have video tutorials included.
Frequently Asked Questions
- What is a Flutter Alert dialog with textfield?
A Flutter Alert dialog with textfield is a user interface component that combines an alert dialog box and a text field. It is used to prompt users for input by displaying a pop-up window with an editable text field. - How can I implement a Flutter Alert dialog with textfield?
To implement a Flutter Alert dialog with textfield, you can use the AlertDialog widget and add a TextField widget to it. You can then use the showDialog function to display the Alert dialog. - How do I handle user input in a Flutter Alert dialog with textfield?
You can use the TextEditingController class to get the user input from the text field in the Alert dialog. You can create an instance of the TextEditingController class and pass it to the TextField widget. You can then access the text entered by the user using the text property of the TextEditingController. - Can I customize the appearance of the Flutter Alert dialog with textfield?
Yes, you can customize the appearance of the Flutter Alert dialog with textfield by using the AlertDialog widget’s properties, such as the title, content, actions, and shape. You can also use the decoration property to add a background color or border to the Alert dialog. - Can I add validation to the text field in the Flutter Alert dialog?
Yes, you can add validation to the text field in the Flutter Alert dialog by using the validator property of the TextFormField widget. You can define a function that validates the user input and return an error message if the input is invalid. You can then use the Form widget to wrap the TextFormField widget and display the error message if the input is invalid.
Happy learning!