In this Swift tutorial, you will learn how to encode UIImage data to Base64 string. To verify that the UIImage data was correctly encoded into the Base64 string, we will decode the Base64 string back into image data and will create a new UIImage using this data.
If you are interested in video lessons on how to write Unit tests and UI tests to test your Swift mobile app, check out this page: Unit Testing Swift Mobile App
Create UIImage
Before I can encode existing image data into the Base64 string, I will need to have UIImge create. To create a new UIImage in Swift I can add an image file to my Xcode project and then create a new image using this image file name.
let catImage = UIImage(named: "cat.jpg")
To make an image display in the app I can use the following Swift code snippet.
let catImage = UIImage(named: "cat.jpg")

let myImageView:UIImageView = UIImageView()
myImageView.contentMode = UIView.ContentMode.scaleAspectFit
myImageView.frame.size.width = 200
myImageView.frame.size.height = 200
myImageView.center = self.view.center

myImageView.image = catImage
view.addSubview(myImageView)
Encode Image Data to Base64 String
Now when an image is created and is displayed in the app, we can grab the image data and encode it to the Base64 string. Depending on the image type, we can get image PNG or JPG data.
- Use pngData() to get data of PNG image,
- Use jpegData(compressionQuality: 1) or jpegData(compressionQuality: 0) to get data of JPG image.
//Get data of existing UIImage
let imageData = catImage?.jpegData(compressionQuality: 1)
To encode image Data into the Base64 string we need to use the base64EncodedString() method of a Data object.
// Convert image Data to base64 encodded string
let imageBase64String = imageData?.base64EncodedString()
print(imageBase64String ?? "Could not encode image to Base64")
Create UIImage From Base64 String
The encoded Base64 string can be decoded back into a Data object.
let newImageData = Data(base64Encoded: imageBase64String!)
Once we have the Data object we can use it to create UIImage
let newImageData = Data(base64Encoded: imageBase64String!)

if let newImageData = newImageData {
   myImageView.image = UIImage(data: newImageData)
}
Complete Code Example
Below is a complete code example in Swift. You can copy it and paste it into the Xcode Playground project to see how it works. The Base64 encoded string will be printed out to the console.
import UIKit
import PlaygroundSupport

class MyViewController : UIViewController {

    override func viewDidLoad() {
        super.viewDidLoad()

        let view = UIView()
        view.backgroundColor = .white

        let catImage = UIImage(named: "cat.jpg")

        let myImageView:UIImageView = UIImageView()
        myImageView.contentMode = UIView.ContentMode.scaleAspectFit
        myImageView.frame.size.width = 200
        myImageView.frame.size.height = 200
        myImageView.center = self.view.center

        myImageView.image = catImage

        view.addSubview(myImageView)

        //Get data of existing UIImage
        let imageData = catImage?.jpegData(compressionQuality: 1)

        // Convert image Data to base64 encodded string
        let imageBase64String = imageData?.base64EncodedString()
        print(imageBase64String ?? "Could not encode image to Base64")

         let newImageData = Data(base64Encoded: imageBase64String!)
         if let newImageData = newImageData {
            myImageView.image = UIImage(data: newImageData)
         }

        self.view = view
    }

}

PlaygroundPage.current.liveView = MyViewController()
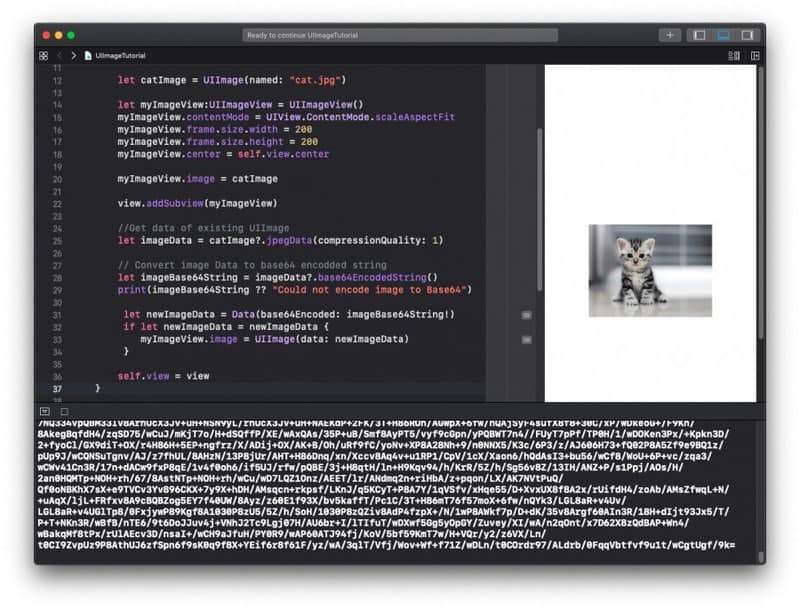
Here is how the above code snippet looks and works in Xcode Playground.
I hope this tutorial was of some value to you. There are other interesting tutorials on this blog if you check the Swift tutorials page.
Happy Swift coding! 🙋🏻♂️