In this tutorial, you will learn how to create UIImage and UIImageView in Swift programmatically.
If you are interested in video lessons on how to write Unit tests and UI tests to test your Swift mobile app, check out this page: Unit Testing Swift Mobile App
Add Image to Xcode Project
For your app to be able to display an image, the image needs to be either added to your app bundle or loaded from the Internet using an image URL.
For this tutorial, I will use an image that I have downloaded from the Internet and added to my Xcode project. So your first step will be to add an image to your Xcode project. You can do it by simply dragging and dropping an image to your Xcode project. In the case of Xcode Playgrounds, to a Resources folder.
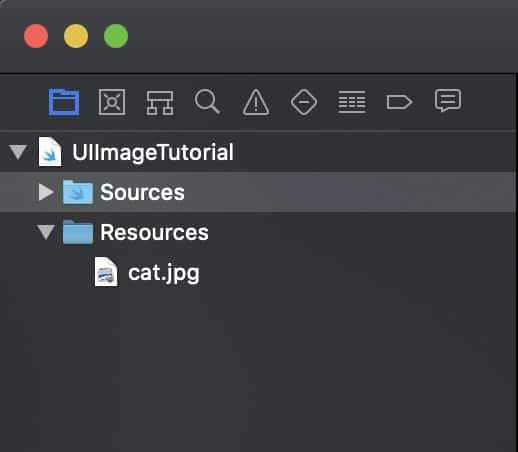
I am using the Xcode playground and below and a screenshot of a project structure in Xcode playgrounds that shows the Resources folder with an image added.
Create UIImage Programmatically
To create a new UIImage programmatically in Swift, we simply need to create a new instance of UIImage providing it with the name of the image we have added to a Resources folder.
let catImage = UIImage(named: "cat.jpg")
Once we have an instance of UIImage created, we can add it to a UIImageView.
Create UIImageView Programmatically
To make our image display in the app, we will need to add it to a UIImageView. To create a new UIImageView programmatically in Swift, we need to create a new instance of UIImageView class and then set UIImage to an image property. Like so:
let catImage = UIImage(named: "cat.jpg")
let myImageView:UIImageView = UIImageView()
myImageView.image = catImage
The code snippet above creates a new instance of UIImageView and adds an image to it. However, it is not enough to make an image display. We will also need to set an image view size and add the image view as a subview to our main view. Like so:
let catImage = UIImage(named: "cat.jpg")

let myImageView:UIImageView = UIImageView()
myImageView.contentMode = UIView.ContentMode.scaleAspectFit
myImageView.frame.size.width = 200
myImageView.frame.size.height = 200
myImageView.center = self.view.center

myImageView.image = catImage

view.addSubview(myImageView)
Complete Code Example
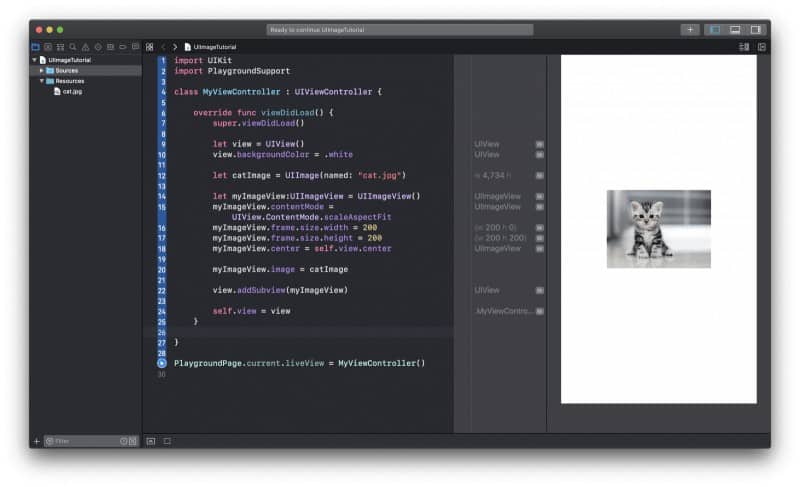
Below is a complete code example in Xcode Playgrounds.
import UIKit
import PlaygroundSupport

class MyViewController : UIViewController {

    override func viewDidLoad() {
        super.viewDidLoad()

        let view = UIView()
        view.backgroundColor = .white

        let catImage = UIImage(named: "cat.jpg")

        let myImageView:UIImageView = UIImageView()
        myImageView.contentMode = UIView.ContentMode.scaleAspectFit
        myImageView.frame.size.width = 200
        myImageView.frame.size.height = 200
        myImageView.center = self.view.center

        myImageView.image = catImage

        view.addSubview(myImageView)

        self.view = view
    }
}

PlaygroundPage.current.liveView = MyViewController()
I hope this Swift tutorial was of some value to you and you now know how to create a simple UIImage programmatically and how to make it display in your app by adding an image to a UIImageView and then adding the UIImageView as a subview on the main view.
Happy Swift coding! 🙋🏻♂️