In this Flutter tutorial, you will learn a few different ways of fetching an image from the Internet.
Fetching an image in Flutter is very easy. You can either use a widget or a Provider and wrap it with a widget. Let’s see how it’s done!
Using Image.network() Constructor
Flutter provides an Image widget to display different types of images. One of the ways to display an image in Flutter is to use the Image.network() constructor which will fetch an image using its URL.
Image.network('https://picsum.photos/250?image=9')
Below is a very basic Flutter app code example that uses the Image.network() constructor to fetch and display an image.
import 'package:flutter/material.dart';

void main() => runApp(MyApp());

class MyApp extends StatelessWidget {
  @override
  Widget build(BuildContext context) {
    var title = 'Web Images';

    return MaterialApp(
      title: title,
      home: Scaffold(
        appBar: AppBar(
          title: Text(title),
        ),
        body: Image.network('https://picsum.photos/250?image=9'),
      ),
    );
  }
}
Other types of Image constructors include:
- Image.asset – To display image from assets bundle
- Image.file – To display image from a file
- Image.memory – To display image from Uint8List
- Image.network – To display image from a URL
Making Image to Fit
When displaying an image in a Container, the image might not fit properly initially. You might need to fit an image to make ti display nicely. To do that we need to change the image’s fit property. There are few different ways to fit an image:
- BoxFit.contain – As large as possible but contained within the Container,
- BoxFit.cover – As small as possible but covering the entire Container,
- BoxFit.fill – Fill the entire Container but may distort the image aspect ratio,
- BoxFit.fitHeight – The height of the image will be equal to the container. It will not mess with the image aspect ratio,
- BoxFit.fitWidth – The height of the image will be equal to the container,
- BoxFit.none – Image is not resized at all (default).
Below is a little code example that displays an image in a Container. Since there is no any specific BoxFit property is used, it defaults to BoxFit.none.
import 'package:flutter/material.dart';

void main() => runApp(MyApp());

class MyApp extends StatelessWidget {
  @override
  Widget build(BuildContext context) {
    var title = 'Web Images';

    return MaterialApp(
      title: title,
      home: Scaffold(
        appBar: AppBar(
          title: Text(title),
        ),
        body: Container(
          width: double.infinity,
          height: double.infinity,
          child: Image.network(
            'https://picsum.photos/250?image=9',
          ),
        ),
      ),
    );
  }
}
If you run the above code example, an image will be fetched and will appear as is shown in the image below.
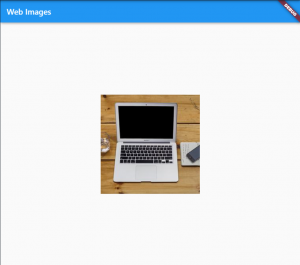
Image with default fit (Boxfit.none)
Using BoxFit.cover
When using BoxFit.cover, the image will display as large as possible but within the container space.
child: Image.network(
     'https://picsum.photos/250?image=9',
     fit: BoxFit.cover,
),
Result:

Image with BoxFit.cover
Using BoxFit.contain
If you go with BoxFit.contain, the image will display as small as possible but while still covering the entire Container.
child: Image.network(
     'https://picsum.photos/250?image=9',
     fit: BoxFit.contain,
),
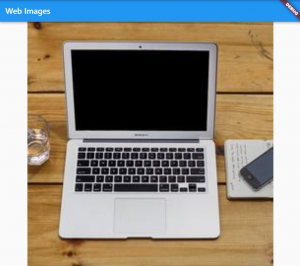
Image as a Container’s Background
If you want to show your image as a background in a Container, you need to use the DecorationImage widget. If you want to fetch an image from the internet, you also need to use the NetworkImage. The NetworkImage is an image provider and is not a widget. An interesting fact is that the Image.network() constructor also uses NetworkImage internally.
You can check this code for some reference on that:
Container(
  decoration: BoxDecoration(
    borderRadius: BorderRadius.circular(10.0),
    image: DecorationImage(
      image: NetworkImage(
        "YOUR_IMAGE_URL",
      ),
    ),
  ),
),
I hope this Flutter tutorial was helpful for you. If you are interested in learning Flutter, please check other Flutter tutorials on this site. Some of them have video tutorials included.
Happy learning!