In the previous blog post, we have covered how to grant access to certain endpoints based on the Role configured through code. As we know, Keycloak is the Identity and Access Management solution that provides out-of-the-box authentication and authorization services. One of the services includes a Fine-Grained Authorization Service. Fine-Grained Authorization Service provides businesses with the ability to control authorizations for all of their services from the Keycloak Administration Console, enabling them to set the policies they need accurately. The scope of this blog post is to understand, explore Fine-Grained Keycloak Authorization Services and use policies and permissions to protect REST APIs. So, let’s, deep dive into it!
Scenario
For example, imagine we have a Laboratory Management System designed for an investigation and diagnostic center. There are several roles involved in the system but in our scope, we will consider the following roles:
- Doctor
- Patient
- Finance Manager
There are certain APIs that can be accessed only by doctors, such as posting, editing, and deletion of a Report. Similarly, there are certain APIs that are allowed to be accessed by patients, such as viewing a report. Also, there are certain costing and billing APIs that are only accessible by the Finance Manager.
Configuration of Keycloak
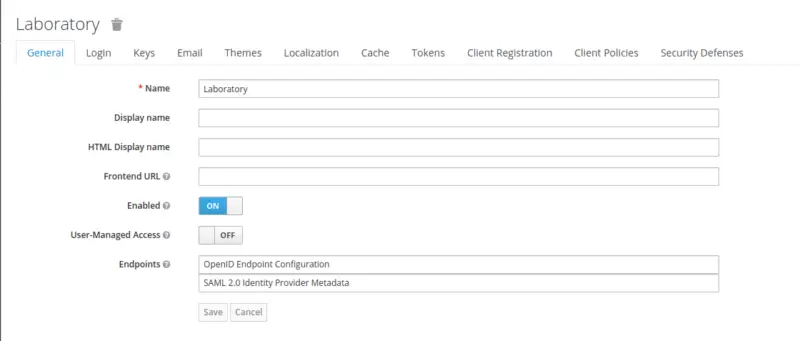
Create a Realm
After logging in to the Keycloak console, in the top left corner there is an option of adding a new Realm. We will create a realm named Laboratory.
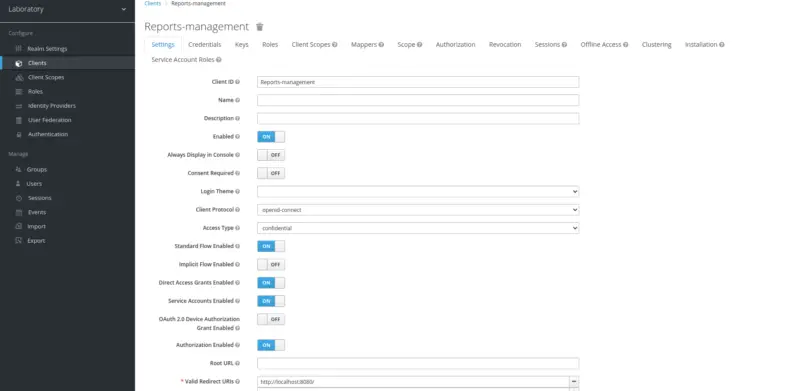
Create a Client
The next step is to create a client, in the left pane, there is an option for Clients. Firstly, we will create a client with the following configurations.
- Client ID: Reports-management
- Access Type: confidential
- Authorization Enabled: ON
- Valid Redirect URIs: htttp://localhost:8080/
Other than these, leave the rest of the properties as default.
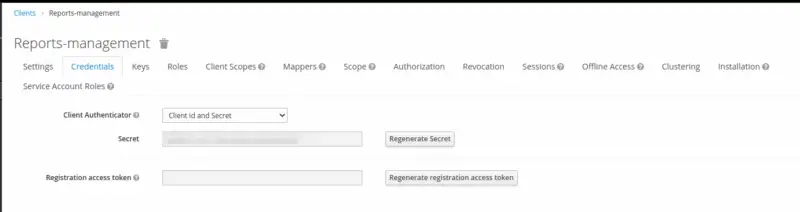
Now, switch to the credentials tab to find out the Client Secret value.
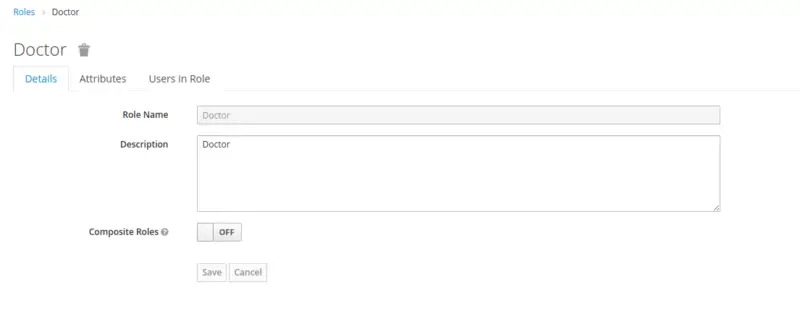
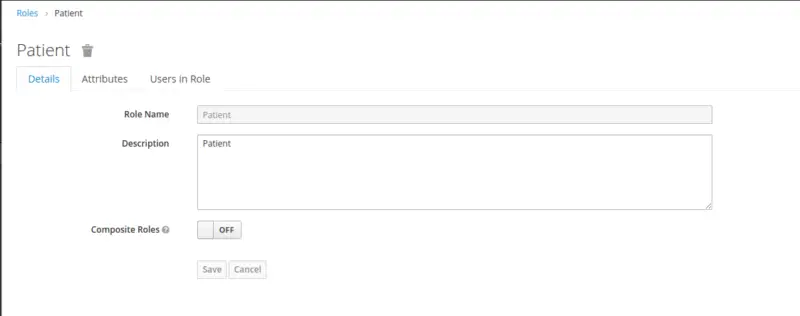
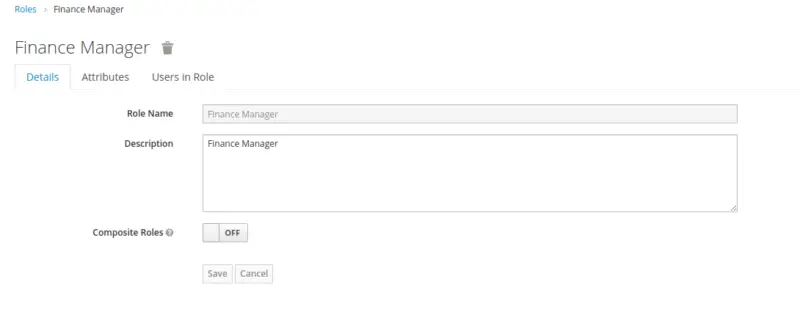
Create Roles
Now move to the Roles section. Create Realm Roles for Doctor, Patient, and Finance Manager.
Create Users
Now, we will create three users for a Doctor, Patient, and Finance Manager User with their respective roles. Move to the Users option in the left pane and then click Add User.
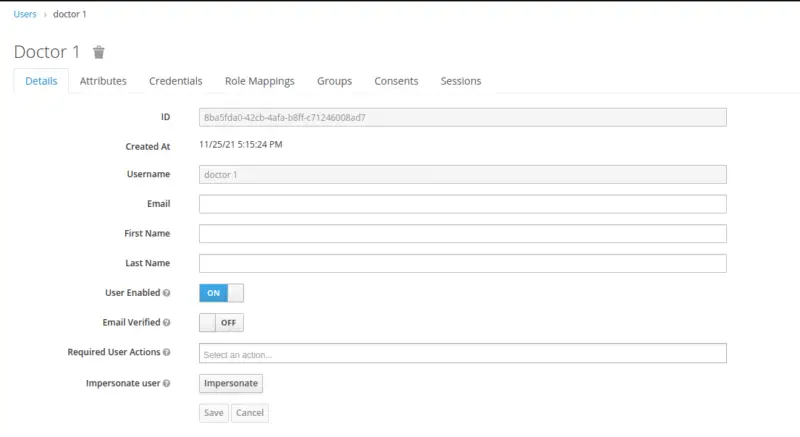
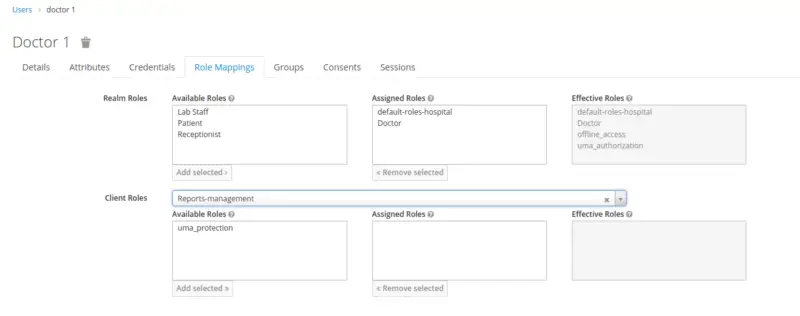
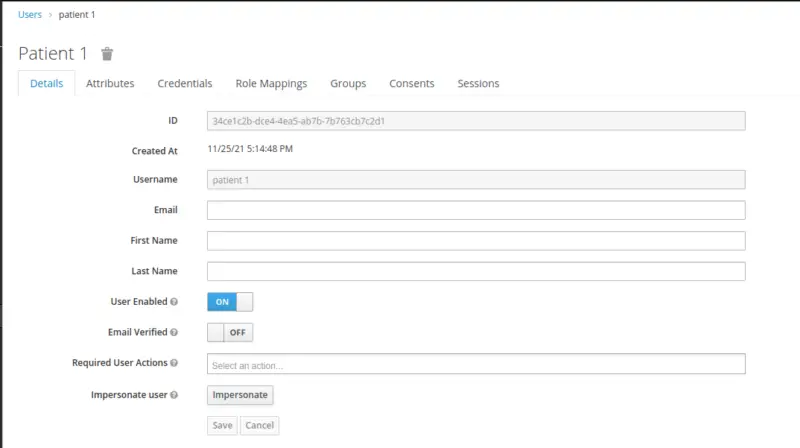
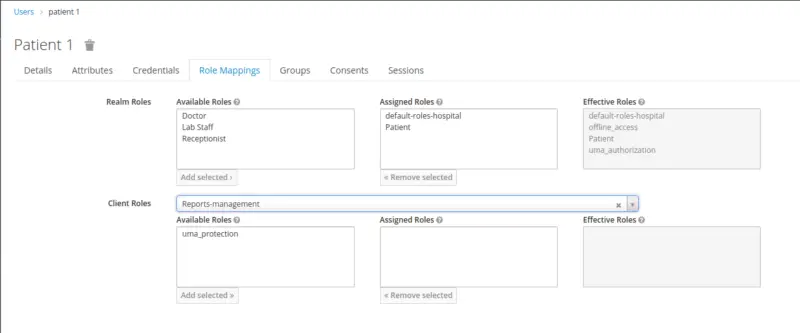
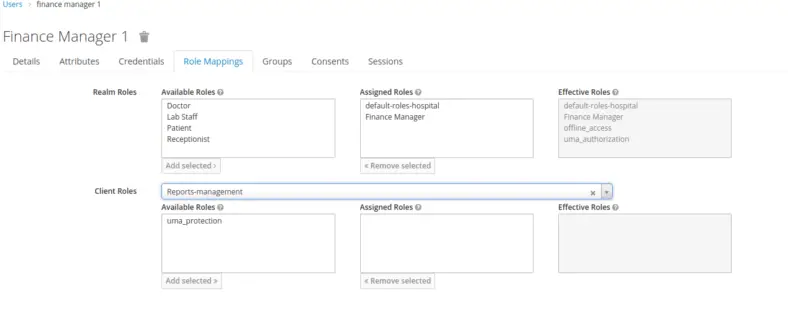
To create a user, provide a username, and set Email Verified to ON. Go to the credentials section and set the user password and turn off the Temporary toggle bar. Then, go to the Role Mappings tab and assign the respective Realm role.
Add User for Doctor
Firstly, we create a user with the username doctor 1 and assign a role of the Doctor.
Add User for Patient
Further, we create a user with the username patient 1 and assign a role of the Patient.
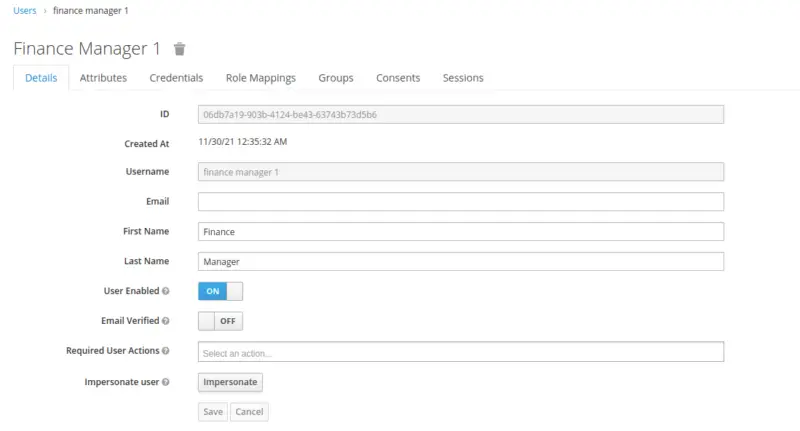
Add User for Finance Manager
Finally, we create a user with the username finance manager 1 and assign a role to the Finance Manager.
Configuration of Fine-Grained Authorization Services
It is important to enable Authorization in the clients’ section. Once it is enabled, then move to the Authorization tab, and configure Fine-grained Authorization Services in Keycloak as outlined below:
Create Resources
As per the official Keycloak Documentation, Resource can be defined as:
A resource can be a web page, a RESTFul resource, a file in your file system, an EJB, and so on.
A resource represents a single object or a group of resources. In our case, we are using the Resource concept to represent a single object (Java Class).
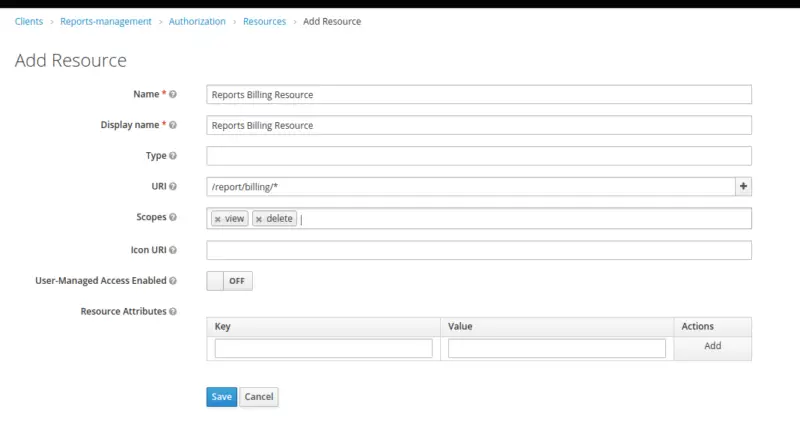
Under the Resource page, create a new Resource Reports Resource. The Resource refers to the protected object.
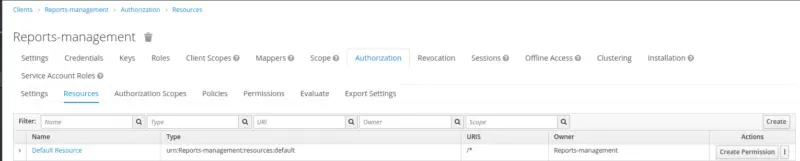
We will create a Resource with the following configurations.
- Name: Reports Resource
- Display Name: reports
- URL: /reports/*
- Scopes: view, edit, delete
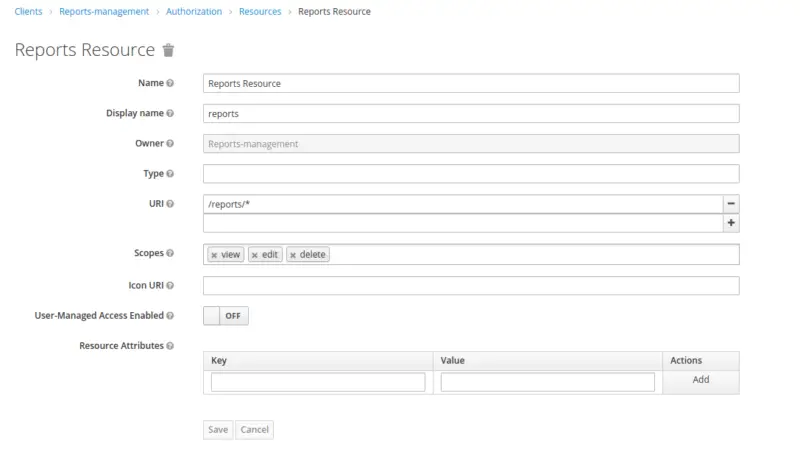
For the sake of simplicity, the Reports Resource allows three scopes, VIEW, EDIT, and DELETE. Scope refers to the operations that we perform on a Resource. Consider it as equivalent to HTTP Methods, GET, PUT, and DELETE.
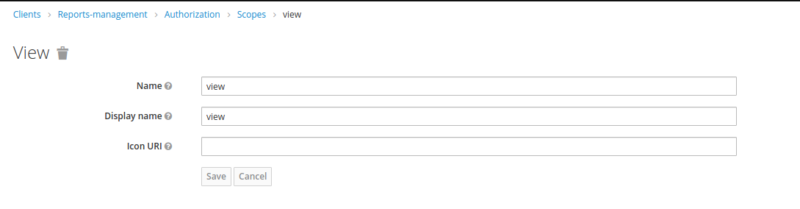
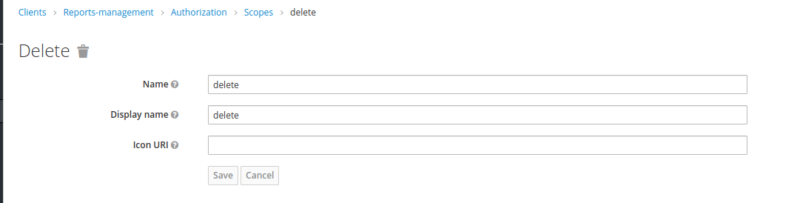
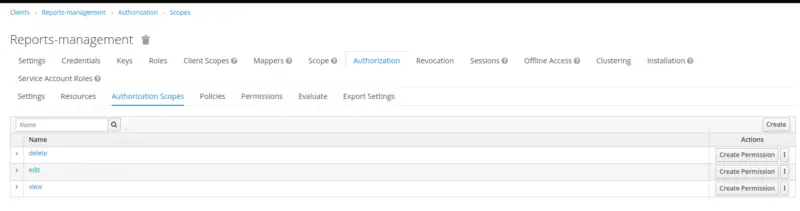
Create Authorization Scopes: delete, edit, and view.
Similarly, create another Resource that represents Report’s Billing.
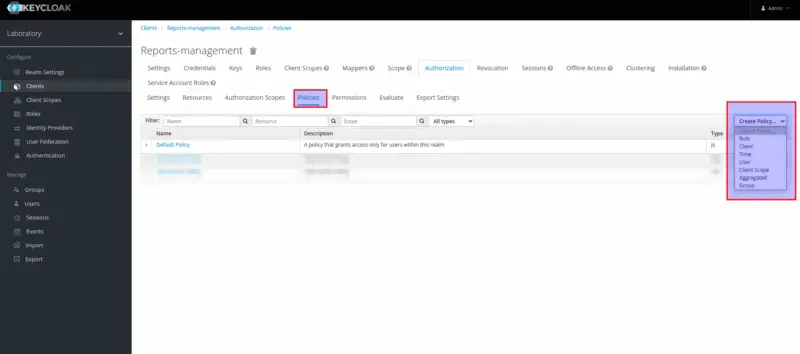
Create Policies
Policies define the conditions that must be satisfied to access or perform operations on a resource or scope level. Keycloak provides us a wide range of built-in policy types:
- Role
- Client
- Time
- User
- Client Scope
- Aggregate
- Group
Here we will create the following policies:
- Role-Based policies for a Doctor and Patient for role-based access.
- User-Based Policy for a particular user to access the report’s billing endpoint.
-
Time-Based Policy to enable access within a specific period.
-
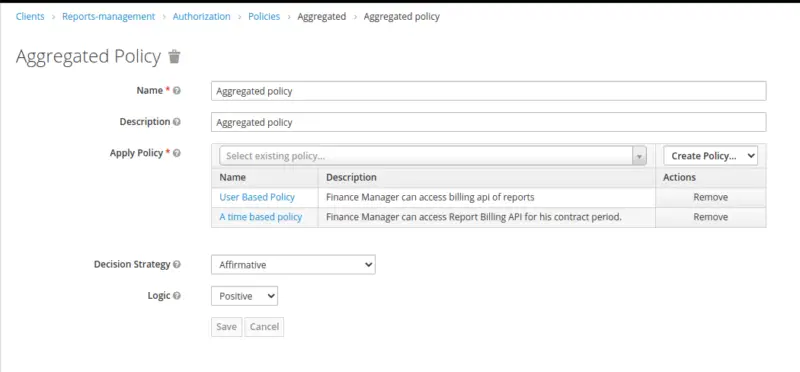
Aggregate Policy is a policy of policies. We will use policy aggregation to re-use User-Based and Time-Based Policies. In essence, it would be helpful in the scenario where user finance manager 1 is employed on a contract basis to handle report billing for a specific period.
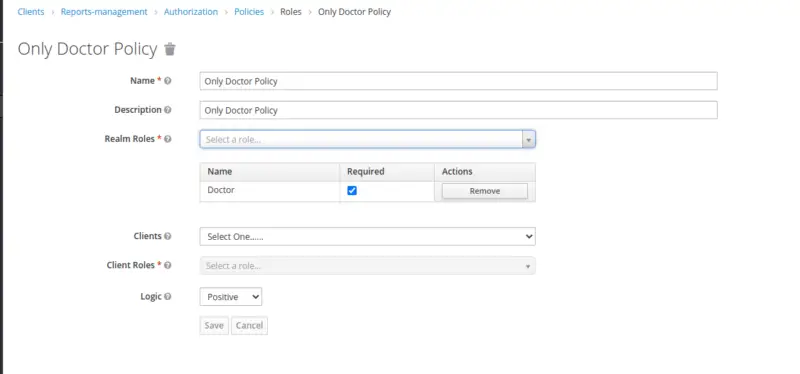
Create Role-Based Policy for a Doctor
The role-based policy defines the conditions under which a group of one or more roles can access an object. In our current scenario, we will create a policy against a Doctor’s Role.
- Name: Add a valid name as per business requirements.
- Description: Add descriptions of the policy
- Realm Roles: Add relevant roles
- Marking Role as Required: Mark the required field to grant access only if the user requesting access possesses all of the required roles.
- Clients: Tie to the client under consideration
- Client Roles: Fill in Client Roles if needed (In our case, we are not using client-specific roles)
- Logic: Positive and negative logic can be configured into the policies.
In a nutshell, this option allows us to specify whether the policy result should be preserved or negated.
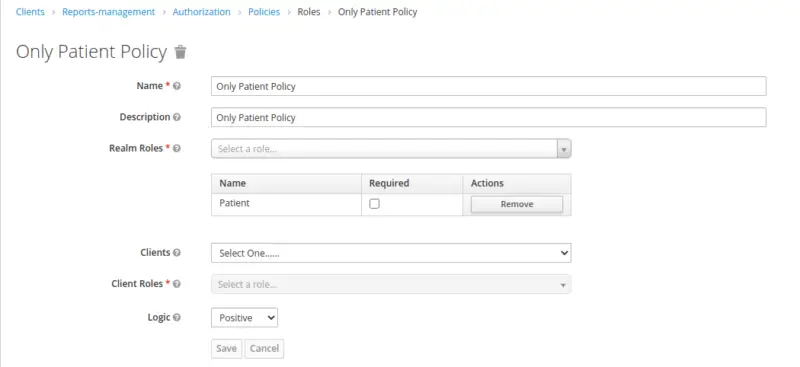
Create Role-Based Policy for a Patient
Similarly, create a Role-Based Policy for a Patient Role.
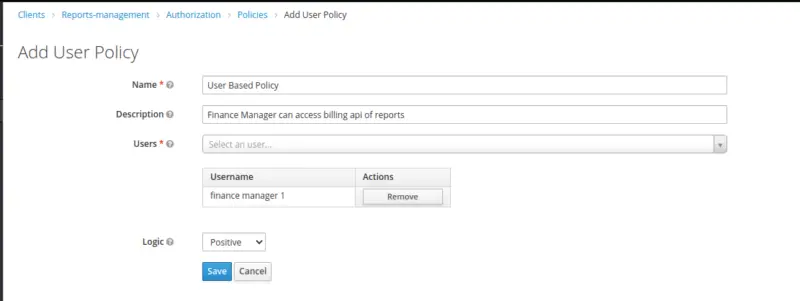
Create User-Based Policy for a user ‘finance manager 1’
This type of policy holds the criteria under which a group of one or more users can access an object. Here, we will define a policy for a user Finance Manager 1 to only access the reports billing API.
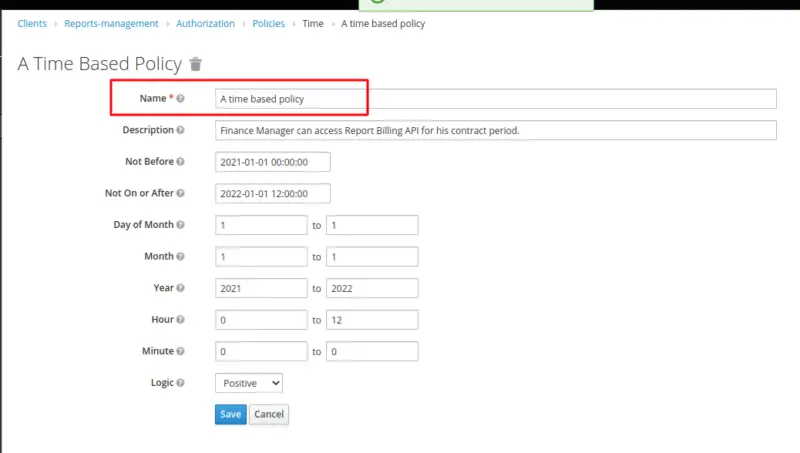
Create Time Based Policy for a particular period
This policy type is used to set temporal limits for permissions. In our example, we will define a time-based policy for a Finance Manager to access API only during his contract period.
Create an Aggregated Policy
The aggregated policy is a collection of policies. Here, in this case, we are using the existing policies i.e. User-based and time-based.
Create Permissions
Permission links the protected object to the policies that must be considered when deciding whether access should be granted or not. Keycloak offers two types of Permissions:
- Resource-Based: A resource-based permission specifies a set of one or more resources that should be protected by one or more authorization policies.
- Scope-Based: A scope-based permission is used to protect a group of one or more scopes using one or more authorization policies.
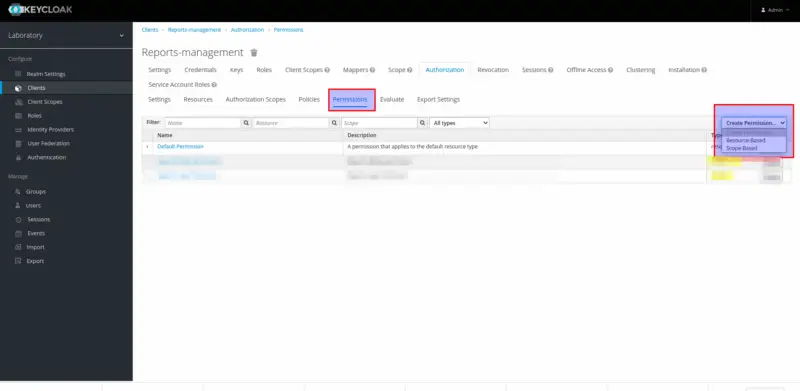
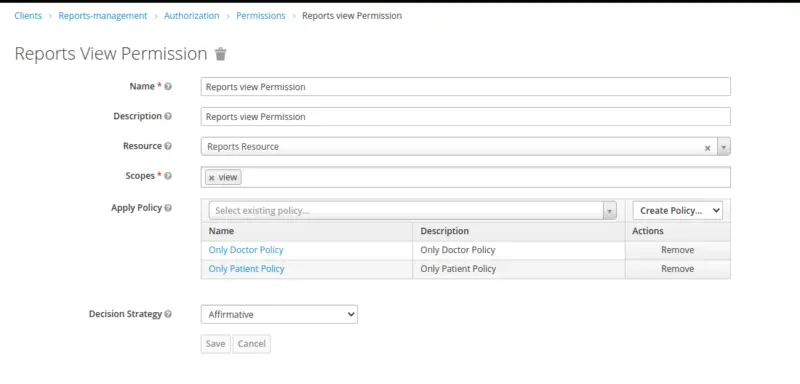
Permission for Viewing the Reports
We will create scope-based permission for viewing the reports. Therefore, select Scope-based from the drop-down list in the upper right corner of the permission listing to create a new scope-based permission.
- Name: Add a valid name as per business requirements.
- Description: Add a description of the permission
- Resource: Add relevant Resources to restrict the scopes specific to the added resource.
- Scopes: Define a set of one or more scopes to protect.
- Apply Policy: Define a set of one or more policies to link with the permission.
- Decision Strategy: The decision strategy specifies how to evaluate the outcome of the linked policies to determine access. Read more about Decision Strategies here.
We will create a Scope Based Permission to access Get Report API by both Doctor and a Patient.
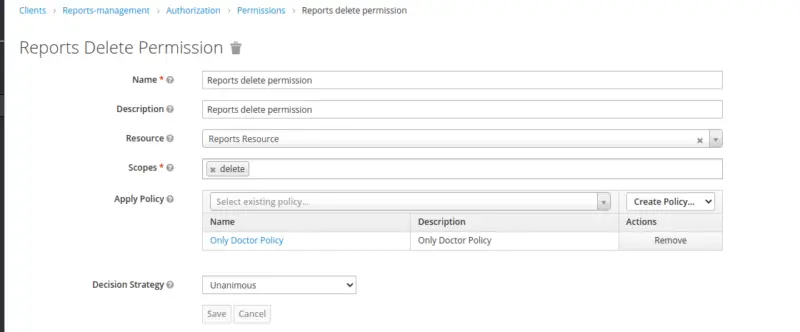
Permission for Deleting the Reports
Similarly, create a Scope Based Permission to access Delete Report API only by the Doctor.
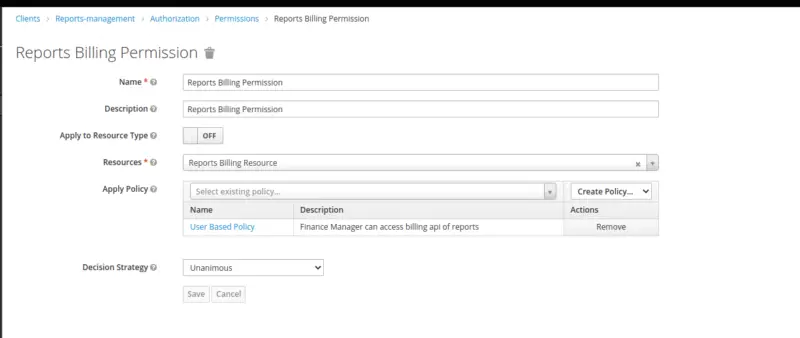
Permission for Accessing the Reports Billing API
Select Resource-based from the drop-down list in the upper right corner of the permission listing to create a new resource-based permission.
- Name: Add a valid name as per business requirements.
- Description: Add a description of your permission
- Apply to Resource Type: It indicates whether the permission applies to all resources of a specific type.
- Resources: Define a set of resources to protect.
- Apply Policy: Define a set of one or more policies to link with the permission.
- Decision Strategy: The decision strategy specifies how to evaluate the outcome of the linked policies to determine access. Read more about Decision Strategies here.
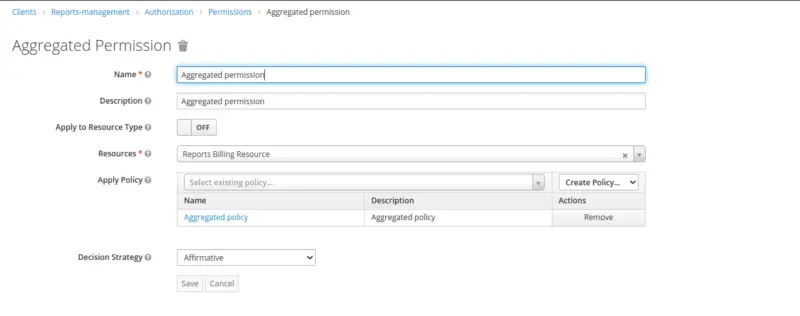
Permission for Aggregate Policy
Similarly, create permission for an Aggregated Policy at a resource level.
Evaluation Time
Keycloak has a fine UI tool for evaluating a user’s and a resource’s permissions.
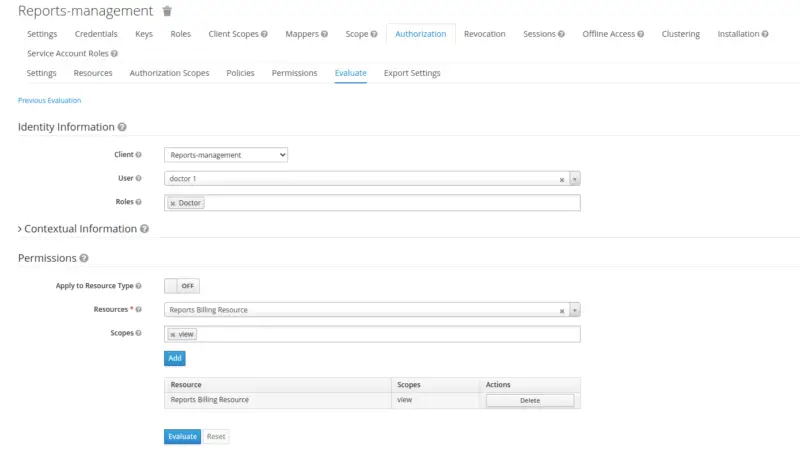
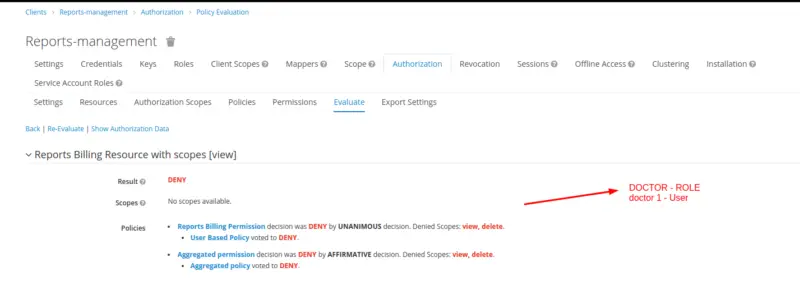
Here observe the evaluation result for users with doctor roles against the resource Resource Billing Resource and a view Scope. As a result of permissions and policy evaluation, we see that user doctor 1 is denied to access the Resource.
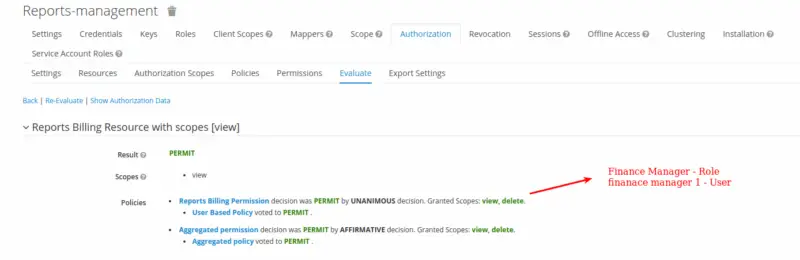
Let’s evaluate the same resource with the user finance manager 1. We observe that the evaluation passes the result

Now that we’ve done configuring fine-grained authorization services in Keycloak, it’s time to start using it in a Spring Boot Application.
Create a Spring Boot Application
We will proceed with the development of our Maven, Spring Boot Project for a simple Laboratory Management System. To learn how to create a very simple Spring Boot application, refer to this tutorial “Create a simple Spring Boot web service project“.
Pom.xml
This is how the pom.xml of our Spring Boot Application looks like:
<?xml version="1.0" encoding="UTF-8"?>
<project xmlns="http://maven.apache.org/POM/4.0.0"
         xmlns:xsi="http://www.w3.org/2001/XMLSchema-instance"
         xsi:schemaLocation="http://maven.apache.org/POM/4.0.0 http://maven.apache.org/xsd/maven-4.0.0.xsd">
    <modelVersion>4.0.0</modelVersion>
    <parent>
        <groupId>org.springframework.boot</groupId>
        <artifactId>spring-boot-starter-parent</artifactId>
        <version>2.5.6</version>
        <relativePath/>
        <!-- lookup parent from repository -->
    </parent>
    <groupId>org.example</groupId>
    <artifactId>KeycloakFineGrainedPermissions</artifactId>
    <version>1.0-SNAPSHOT</version>
    <properties>
        <maven.compiler.source>11</maven.compiler.source>
        <maven.compiler.target>11</maven.compiler.target>
        <springboot-version>2.5.6</springboot-version>
        <keycloak-version>15.0.2</keycloak-version>
    </properties>

    <dependencies>
        <!-- Spring Boot -->
        <dependency>
            <groupId>org.springframework.boot</groupId>
            <artifactId>spring-boot-starter-web</artifactId>
        </dependency>

        <!-- Keycloak -->
        <dependency>
            <groupId>org.keycloak</groupId>
            <artifactId>keycloak-spring-boot-starter</artifactId>
        </dependency>
    </dependencies>

    <dependencyManagement>
        <dependencies>
            <dependency>
                <groupId>org.keycloak.bom</groupId>
                <artifactId>keycloak-adapter-bom</artifactId>
                <version>${keycloak-version}</version>
                <type>pom</type>
                <scope>import</scope>
            </dependency>
        </dependencies>
    </dependencyManagement>

    <build>
        <plugins>
            <plugin>
                <groupId>org.springframework.boot</groupId>
                <artifactId>spring-boot-maven-plugin</artifactId>
                <version>${springboot-version}</version>
            </plugin>
        </plugins>
    </build>

</project>
application.properties
This is how the application.properties file looks like.
- Fill in the Keycloak realm, auth-server-url, resource, secret as per your configurations. Refer to the previous blog for more details.
- Set Keycloak Logging Level to Debug.
- Define security constraints i.e. the roles, the request URLs, and the scopes.
- Map HTTP Methods to the scopes in Keycloak Authorization Services’ i.e. Map GET to view scope and DELETE to delete scope.
keycloak.realm=Laboratory
keycloak.auth-server-url=http://localhost:8180/auth
keycloak.ssl-required=external
keycloak.resource=Reports-management
keycloak.bearer-only=true
keycloak.credentials.secret=xxxxx-xxxx-xxxxx-xxxx-xxxxxxx
logging.level.org.keycloak=DEBUG
keycloak.securityConstraints[0].authRoles[0]=Doctor
keycloak.securityConstraints[0].authRoles[1]=Patient
keycloak.securityConstraints[0].authRoles[2]=Finance Manager
keycloak.securityConstraints[0].securityCollections[0].name=reports management
keycloak.securityConstraints[0].securityCollections[0].patterns[0]=/reports/*
keycloak.securityConstraints[0].securityCollections[0].patterns[1]=/report/billing/*
keycloak.policy-enforcer-config.paths[0].path=/reports/*
keycloak.policy-enforcer-config.paths[0].methods[0].method=GET
keycloak.policy-enforcer-config.paths[0].methods[0].scopes[0]=view
keycloak.policy-enforcer-config.paths[0].methods[1].method=DELETE
keycloak.policy-enforcer-config.paths[0].methods[1].scopes[0]=delete
keycloak.policy-enforcer-config.paths[1].path=/report/billing/*
keycloak.policy-enforcer-config.paths[1].methods[0].method=GET
keycloak.policy-enforcer-config.paths[1].methods[0].scopes[0]=view
Rest Controller
This is how our controller looks like. Here we have only made three simple APIs, one GET API for Doctor and Patient to view the reports, while DELETE API for the Doctor only to delete the reports. Another GET API for Reports billing is created for the Finance Manager of the Laboratory Management System.
package com.keycloakauthorization.rest;

import org.apache.http.HttpStatus;
import org.springframework.http.MediaType;
import org.springframework.http.ResponseEntity;
import org.springframework.stereotype.Controller;
import org.springframework.web.bind.annotation.DeleteMapping;
import org.springframework.web.bind.annotation.GetMapping;
import org.springframework.web.bind.annotation.PathVariable;


@Controller
public class ReportsController {

    @GetMapping(value = "/reports/{id}", produces = MediaType.APPLICATION_JSON_VALUE)
    public ResponseEntity<Object> getReports(@PathVariable("id") String id) {
        return new ResponseEntity<>("GET Reports API triggered", null, HttpStatus.SC_OK);
    }

    @GetMapping(value = "/report/billing/{id}", produces = MediaType.APPLICATION_JSON_VALUE)
    public ResponseEntity<Object> getReportBill(@PathVariable("id") String id) {
        return new ResponseEntity<>("GET Report Billing API triggered", null, HttpStatus.SC_OK);
    }

    @DeleteMapping("/reports/{id}")
    public ResponseEntity<Object> deleteReport(@PathVariable String id) {
        return new ResponseEntity<>("DELETE Reports API triggered", null, HttpStatus.SC_OK);
    }
}
Testing Time
It’s time to test the APIs via Postman. The pre-requisite step is to get tokens for all three users.
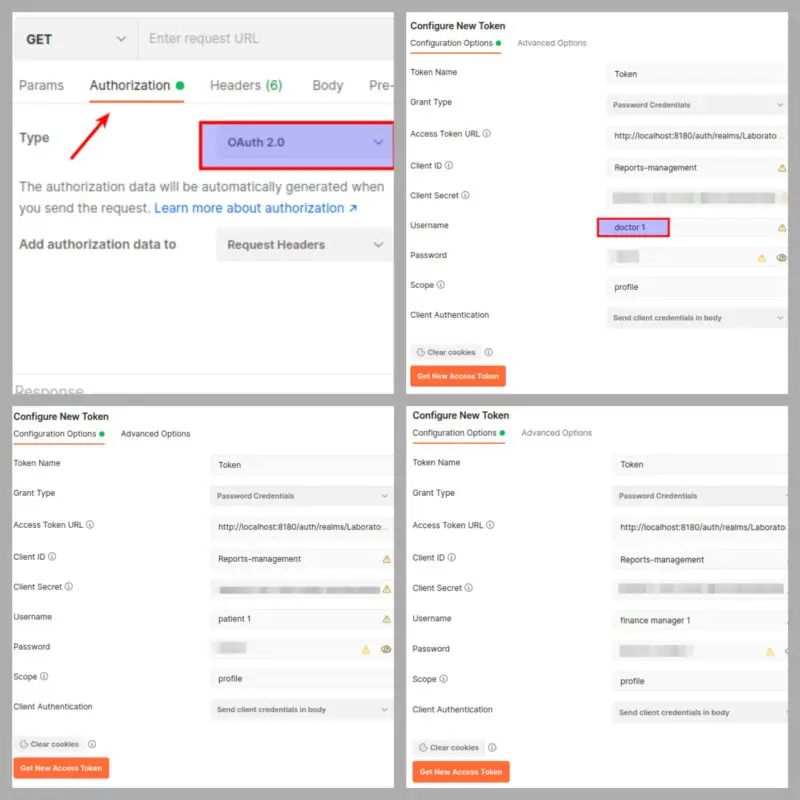
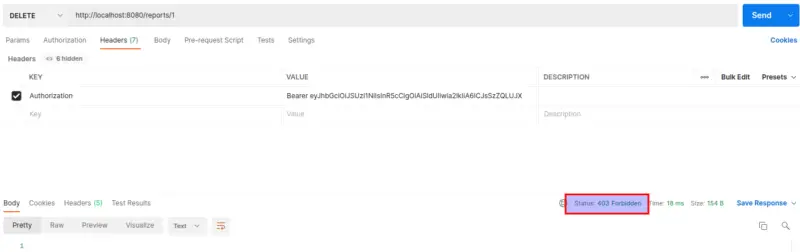
Let’s try to hit DELETE Report API by the Patient Token:
Now, try to hit the same API with Doctor Token. The result is accessible as the Doctor has right to delete the reports.

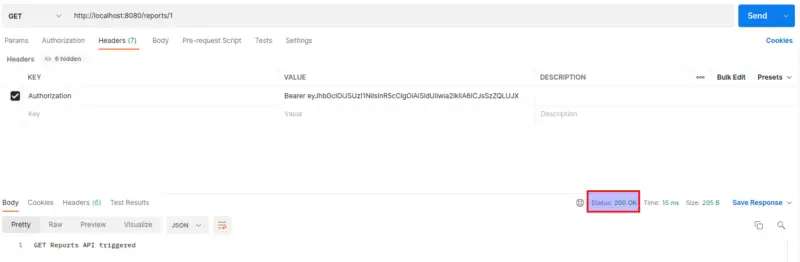
When using the Patient Token to access the View Reports API, it is observed that users with the Patient role have access to the Get Reports API.
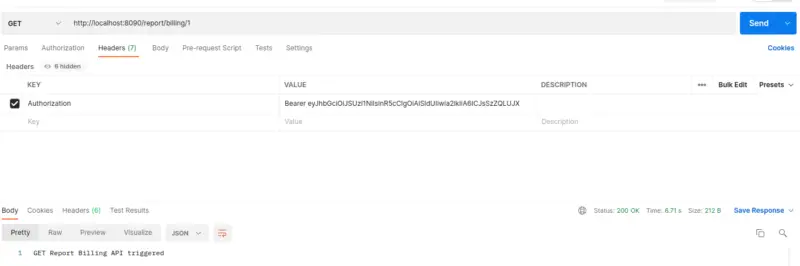
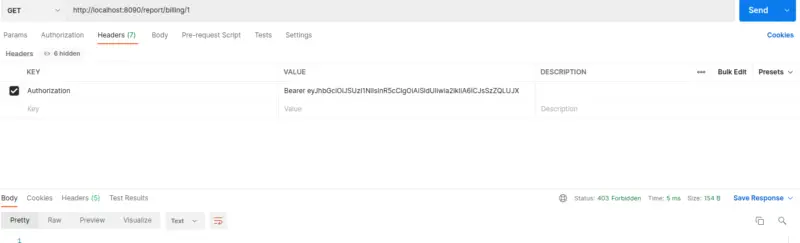
Let’s move to the testing of our Reports Billing Resource. If you call the API with a Doctor or Patient token, you’ll get a Forbidden response. However, if you hit the API with the Finance Manager token, a valid response is received with the HTTP 200 status.
Now, change your system date to observe the result of the Time Based Policy. Update system date to the 01st December 2022 to pass the time period set in the Time Based Policy. As a result, this will return a Forbidden response.
Conclusion
This brings us to the conclusion of our blog on Fine-Grained Authorization Services in Keycloak. In this article, we have explored the authorization services and configured them to protect REST APIs. In conclusion, Keycloak can be used as a centralized solution for Authorization as with this approach changes can be done at runtime, and applications are only concerned about the resources and scopes being protected and not how they are protected.
If you are interested to learn more about Keycloak, check out the Keycloak tutorials page on this site.
Happy Coding!