If you’re new to Java programming or just starting out, it can be a bit overwhelming to know where to begin. That’s why I’ve put together this guide to help you get set up with everything you need to start developing Java applications. In this tutorial, I’ll walk you through the steps of downloading and installing the Java Development Kit (JDK), configuring your environment variables, and downloading and installing Eclipse IDE. Let’s get started!
Overview of the process
Setting up a Java development environment involves a few key steps, including downloading and installing the Java Development Kit (JDK) and configuring some environment variables. Here’s an overview of the process:
Download and install the JDK
The first step in setting up your Java development environment is to download and install the JDK. The JDK is a software development kit used to develop Java applications. It includes the Java Runtime Environment (JRE), which is required to run Java applications, as well as other development tools such as the Java compiler and debugger.
For more details about the specific differences and uses of the JDK and JRE, check out this tutorial JRE, JDK, and JVM: Understanding Differences and Uses.
Set up environment variables
After installing the JDK, you’ll need to set up some environment variables to tell your operating system where to find the Java development tools. Environment variables are variables that are set in your operating system’s environment and are used by applications to locate important files and directories.
Download and Install Eclipse IDE
Downloading and installing Eclipse IDE is an important step in setting up your Java development environment. Eclipse is a popular IDE used by many Java developers because of its extensive features and support for a wide range of plugins.
Download and install the JDK
Java Development Kit (JDK) is a software development environment used to develop Java applications. In this section, we’ll guide you through the process of downloading and installing the JDK on your Windows computer.
1. Find out which version of Windows you have
Before you download the JDK, you need to find out which version of Windows you have. Here’s how to do it:
- Click the “Start” button on your Windows desktop.
- Type “system information” in the search box and click on the “System Information” app.
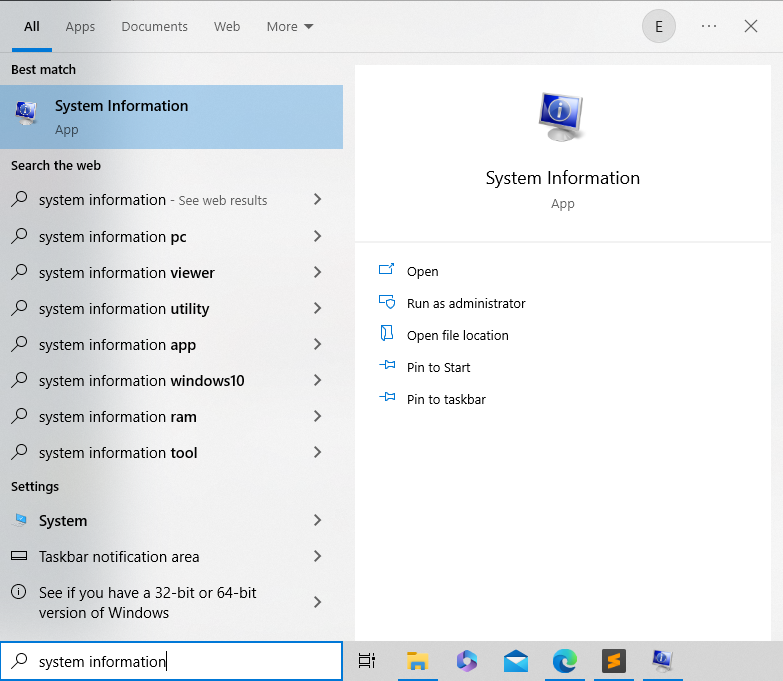
- Look for the “System Type” field in the System Summary section.
- If the value is “x86-based PC”, you need to download the 32-bit version of the JDK. If the value is “x64-based PC”, you need to download the 64-bit version of the JDK.
2. Download the correct JDK for your Windows version
Once you know which version of Windows you have, you can download the appropriate version of the JDK from the Oracle website. Follow these steps to download the JDK:
- Open a web browser and go to the Oracle JDK download page (Java Downloads).
- Scroll down to the “Java SE Development Kit” section and click the “Download” button.
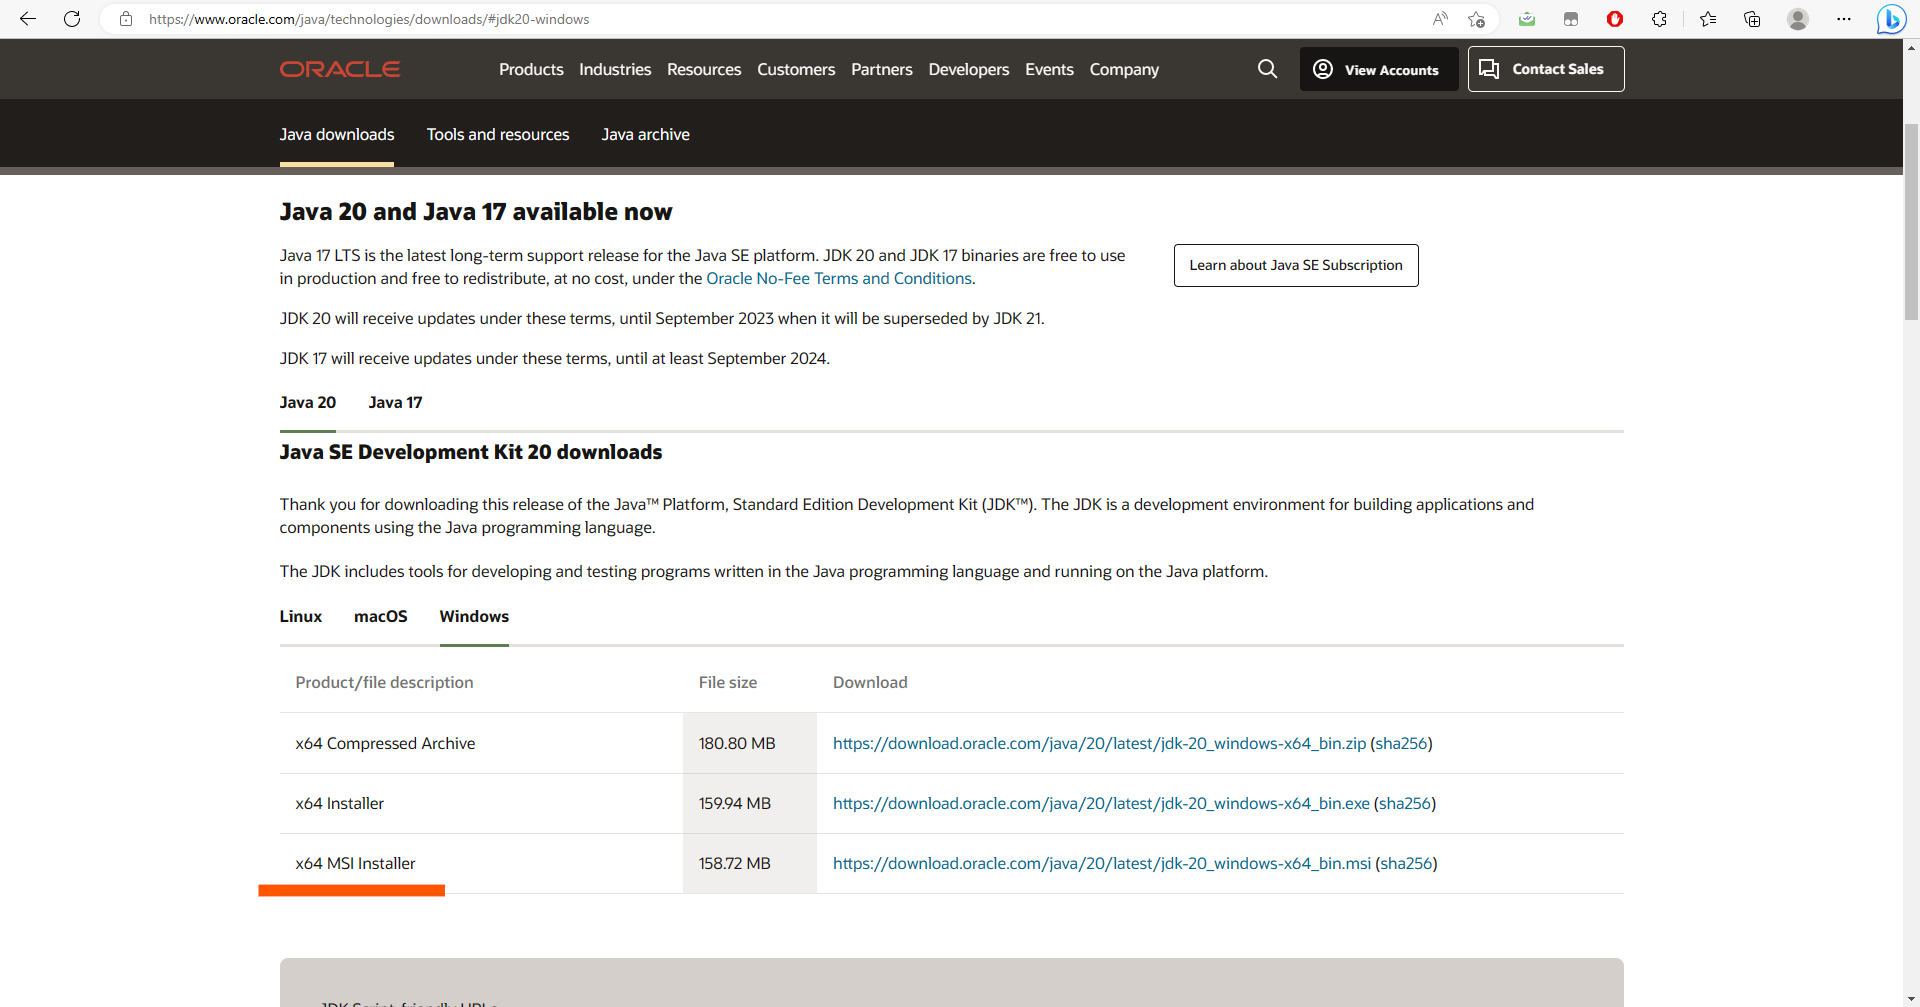
- Read and accept the license agreement.
- Click the download link for the version of the JDK that matches your Windows version.
3. Install the JDK you just downloaded
After you download the JDK, you can install it on your Windows computer. Follow these steps to install the JDK:
- Double-click the downloaded file to start the installation process.
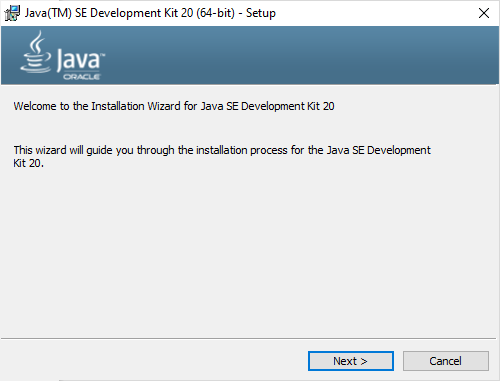
- Follow the instructions in the installation wizard to complete the installation (Make sure to keep the installation directory as the default, as we will be using it later.).

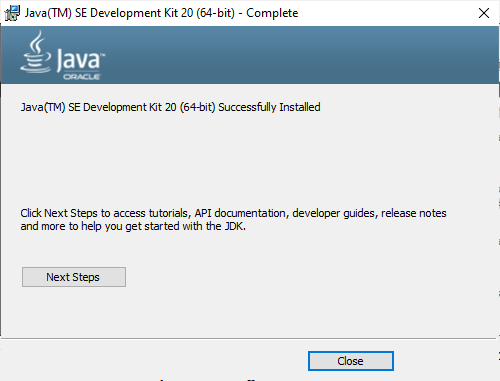
- After the installation process is complete, you will be prompted to close the installer. Click the ‘Close’ button to finish the installation and exit the installer.
Setting up the Environment Variables
Overview of Environment Variables
Before you can start developing in Java, it’s important to set up your environment variables properly. Environment variables are system-wide settings that are used by various programs and scripts to locate and execute commands, applications, and other resources. In particular, two environment variables are important for Java developers: JAVA_HOME and PATH.
- JAVA_HOME: This variable points to the root directory of your JDK (Java Development Kit) installation. It’s used by various tools and scripts to locate the Java runtime environment (JRE) and other JDK tools, such as the
javaccompiler andjavainterpreter. - PATH: This variable specifies a list of directories that the operating system searches when you enter a command in the terminal or command prompt. When you add the JDK’s
bindirectory to thePATH, you can use the JDK tools (such asjavacandjava) from any directory in your terminal or command prompt.
Accessing the Environment Variables Window
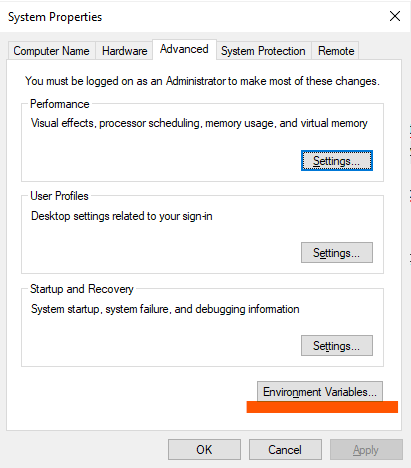
To set up your environment variables on Windows:
- Open the Start menu and search for Environment Variables.
- Click on Edit the system environment variables.
- In the System Properties window, click on the Environment Variables button.
Creating the JAVA_HOME Environment Variable
To create the JAVA_HOME environment variable:
- Click on the New button in the System Variables section.
- Enter
JAVA_HOMEas the variable name. - Enter the path to your JDK installation directory as the variable value(The default installation directory for JDK on Windows is typically
C:\Program Files\Java\). For example,C:\Program Files\Java\jdk-20.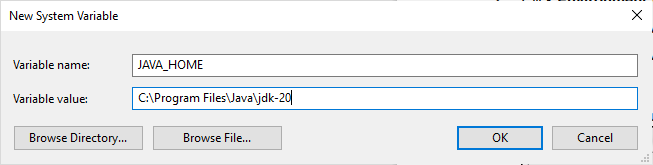
- Click OK to save the variable.
For instructions on configuring JAVA_HOME on a Mac computer, refer to this tutorial How to Set JAVA_HOME on Mac.
Adding the JDK Tools to the System Path Environment Variable
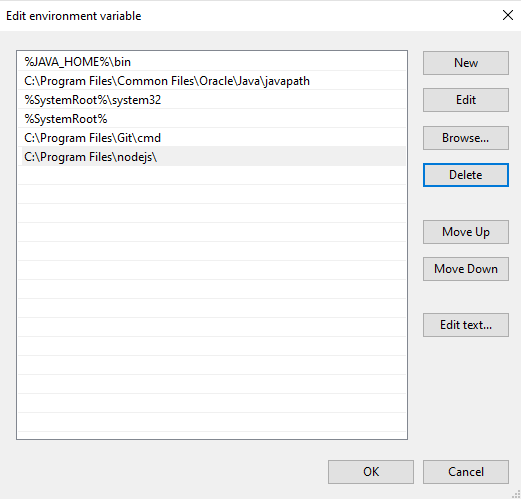
To add the JDK tools to the PATH environment variable:
- Locate the
Pathvariable in the System Variables section and click on Edit.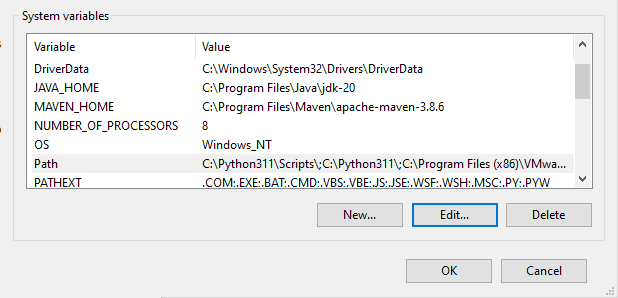
- Click on New and add “%JAVA_HOME%\bin” to the list. The percent signs indicate that Windows should replace the expression with the actual value of the environment variable. For example, if you set the value of
JAVA_HOMEtoC:\Program Files\Java\jdk-20, Windows will expand “%JAVA_HOME%\bin” to “C:\Program Files\Java\jdk-20\bin” when resolving the path to the JDK commands. This allows Windows to successfully find and execute the commands you type in a command prompt. - Click OK to save the variable.
Verifying the Installation Process
To verify that your Java development environment is set up correctly:
- Open a new terminal or command prompt window.
- Type
java -versionand press Enter. This should display the version of Java that is currently installed on your system. - Type
javac -versionand press Enter. You should be able to see the version of the Java compiler that is presently installed on your system.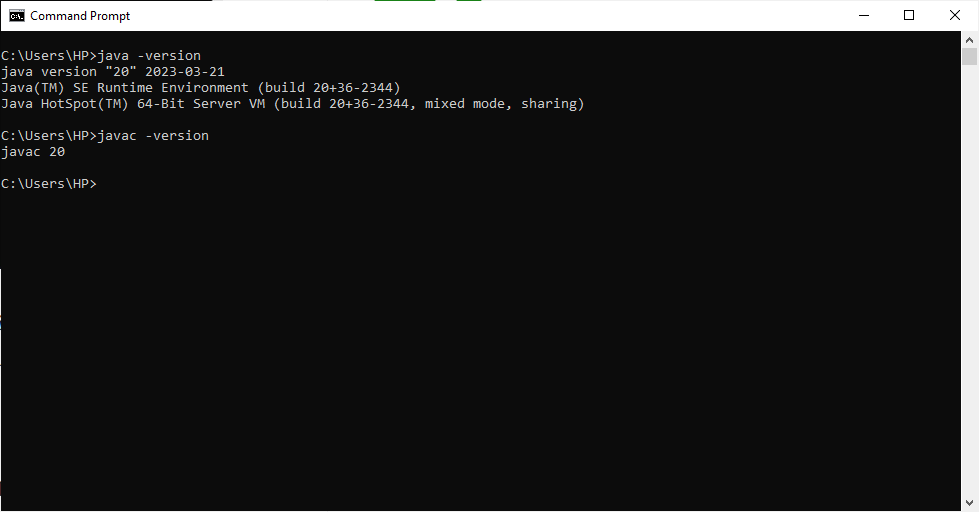
If both commands display the correct version numbers like in the image above, then your Java development environment is set up correctly and you’re ready to start developing in Java.
Downloading and Installing Eclipse IDE
Once you’ve set up your Java Development Environment by installing the JDK and configuring your environment variables, the next step is to download and install Eclipse IDE. Eclipse is a popular integrated development environment for Java developers that provides a comprehensive set of tools and features to help you create, test, and debug your Java applications.
To download Eclipse, simply visit the Eclipse download page at Eclipse Downloads and select the version that’s appropriate for your operating system. There are versions available for Windows, macOS, and Linux, so make sure to choose the right one for your machine.
During the Eclipse installation process, you’ll be asked to select the package that you want to install. The recommended package is “Eclipse IDE for Java Developers.” This package includes all the necessary tools and plugins for developing Java applications, such as the Java Development Tools (JDT) plugin, which provides features like code completion, refactoring, and debugging support.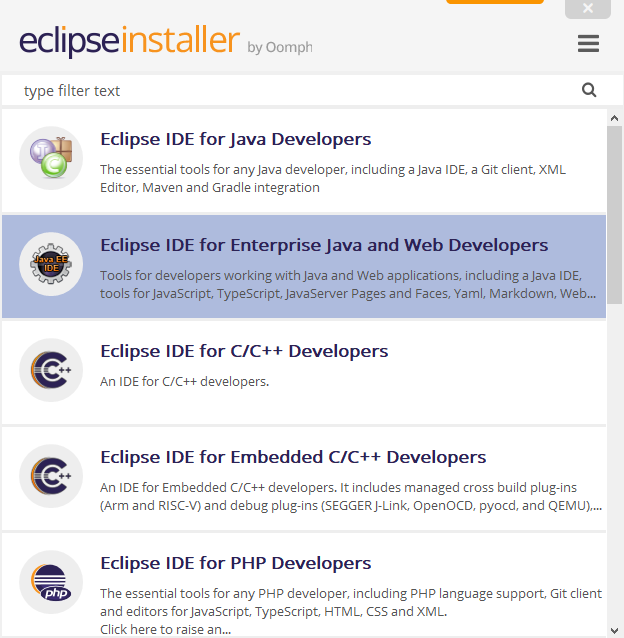
Once you’ve done this, simply follow the prompts to install Eclipse on your computer. You’ll be asked to select a directory for the installation and choose any additional features or plugins you’d like to include.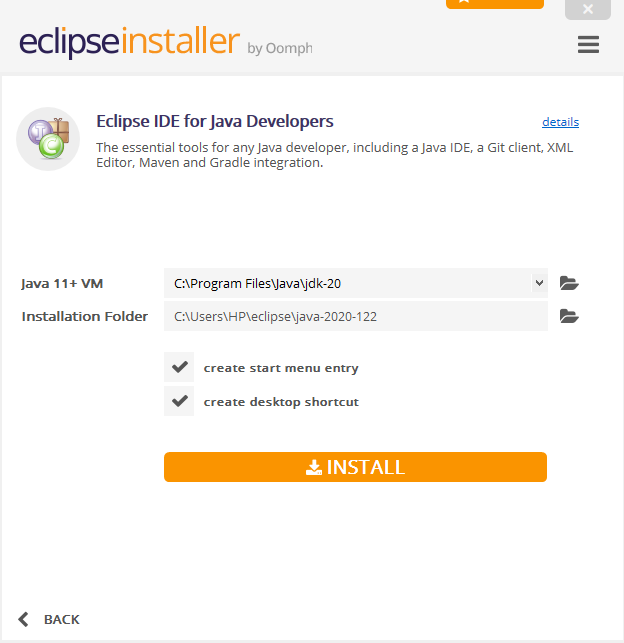
After the installation is complete, you can launch Eclipse and start using it to develop your Java applications. If you’re new to Eclipse, it may take some time to get used to its interface and features, but with practice, you’ll soon become comfortable with the IDE and all it has to offer.
Conclusion
Great job! You’ve successfully set up your Java development environment and are now ready to start creating your first Java programs. To help you get started with writing code, check out this tutorial on How to Compile and Run your First Java Program. This tutorial will guide you through the process of writing, compiling, and executing a simple Java program, so you can see how it all works in action.
Also, make sure to check out the Java Tutorial for Beginners page for more interesting tutorials on Java programming. Whether you’re new to programming or looking to expand your skills, there’s something here for everyone. So why not explore and see what you can learn? Have fun coding!
Frequently Asked Questions
- Is JRE automatically installed with JDK?
Yes, JRE (Java Runtime Environment) is automatically installed with JDK (Java Development Kit). The JDK includes the JRE as a subset, which allows you to run Java applications on your machine. - Can JRE work without JDK?
Yes, JRE (Java Runtime Environment) can work without JDK (Java Development Kit). JRE is used to run Java applications on a computer, while JDK is used to develop Java applications. So if you only want to run Java applications, you only need to install JRE. However, if you want to develop Java applications, you need to install JDK. - Do I need to install Java if I have JDK?
No, you do not need to install Java separately if you have JDK installed. JDK includes the Java Runtime Environment (JRE) and all the necessary components to develop and run Java applications. So, having JDK installed on your system is enough to develop and execute Java programs. - Why we install JDK instead of JVM?
We install JDK instead of JVM because JDK includes the JVM along with other development tools and libraries necessary for Java programming, whereas JVM alone is only responsible for executing Java bytecode. Therefore, to develop Java programs, we need JDK installed on our system.