In this tutorial, I am going to share with you how to programmatically create a new UILabel that supports multiple lines. By default when you create a UILabel, the text you set on the label will go in one line and if the text is longer than the width of the label, it will be truncated rather than continued on the next line.
To set the number of lines we want our UILabel to support we will use a numberOfLines property. For example, to make UILabel support two lines, we will set the numberOfLines property to 2.
label.numberOfLines = 2 // Set the number of lines to two
To make our UILabel support an unlimited number of lines, we should set the numberOfLines property to zero. Like so:
label.numberOfLines = 0 // Unlimited number of lines
Although, in some situations, setting the numberOfLines property alone is not enough. For example, if the height of UILabel is set, then it will have a higher priority and the number of lines property will not be respected.
UILabel numberOfLines Property with Auto Layout
To make UILabel accommodate multiple lines of text and adjust its height accordingly I will use Auto Layout.
let label = UILabel()
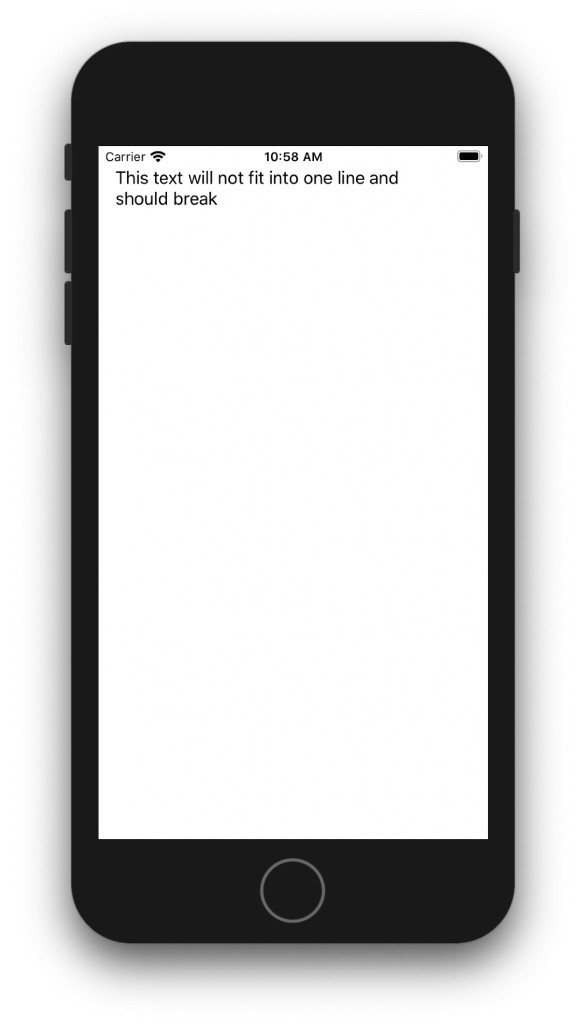
label.text = "This text will not fit into one line and should break"
label.numberOfLines = 2
label.translatesAutoresizingMaskIntoConstraints = false
label.lineBreakMode = .byWordWrapping
view.addSubview(label)
NSLayoutConstraint.activate([
label.topAnchor.constraint(equalTo: view.layoutMarginsGuide.topAnchor),
label.trailingAnchor.constraint(equalTo: view.layoutMarginsGuide.trailingAnchor),
label.leadingAnchor.constraint(equalTo: view.layoutMarginsGuide.leadingAnchor)
])
Notice that I had to set the translatesAutoresizingMaskIntoConstraints property to false. This is because if you want to use Auto Layout to dynamically calculate the size and position of your view, you must set this property to false, and then provide a non-ambiguous, non-conflicting set of constraints for the view.
I have then used the NSLayoutConstraint to make my label stick to the top of its superview and have made the label stretch from left to right side of its superview.
- topAnchor.constraint – will make the UILabel stick to the top of its superview,
- leadingAnchor.constraint – will make the left side of the label, stick to its superview on the left and,
- trailingAnchor.constraint – will make the right side of the label stretch all the way to the right until its superview.
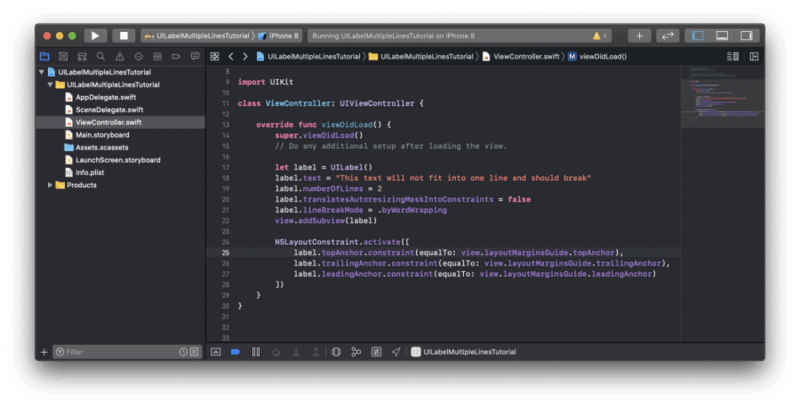
Here is how this code looks in my Xcode.
And here is how this code works if I run it in iPhone Simulator.
I hope this tutorial was helpful to you and you will be able to make your UILabel(s) support multiple lines. Have a look at other Swift tutorials on this site or have a look at the below list of online video courses that teach Swift. Hopefully, you will find more to learn.