In this article, you will learn how to perform user authentication with Amazon Cognito in a Spring Boot application. But before we dive into that, let’s first explore what Amazon Cognito is.
According to what’s mentioned on the AWS official website:
Amazon Cognito lets you add user sign-up, sign-in, and access control to your web and mobile apps quickly and easily. Amazon Cognito scales to millions of users and supports sign-in with social identity providers, such as Apple, Facebook, Google, and Amazon, and enterprise identity providers via SAML 2.0 and OpenID Connect.
So spend your time creating great apps and let Amazon Cognito handle authentication.
In this tutorial, firstly you will set up Amazon Cognito in your AWS account, and then you will integrate it with your Spring Boot Application. So let’s get started!
Amazon Cognito Configuration
After signing in to the Amazon console, go to the Services tab. Here you can find all the services offered by AWS. After clicking on Cognito, click on Manage User Pools. After that, this is what you will see

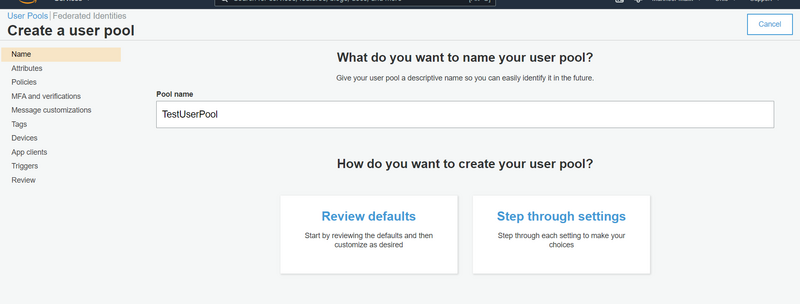
Create User Pool
At the moment, we don’t have any user pools. To create one, click on ‘Create User Pool’, and the following screen will appear. On this page, you can configure Amazon Cognito to meet the requirements of your Spring Boot application. First, provide a name for the pool, as shown in the picture. In our case, we’re setting it to ‘TestUserPool’.
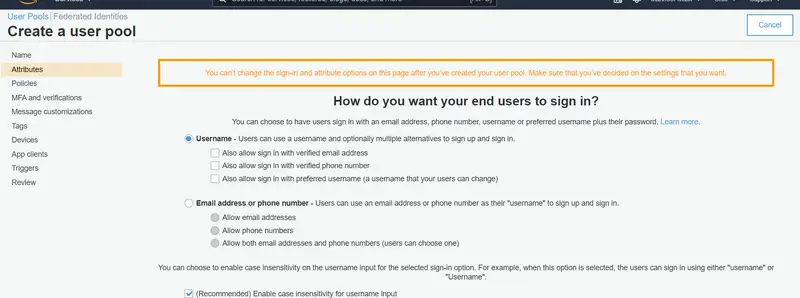
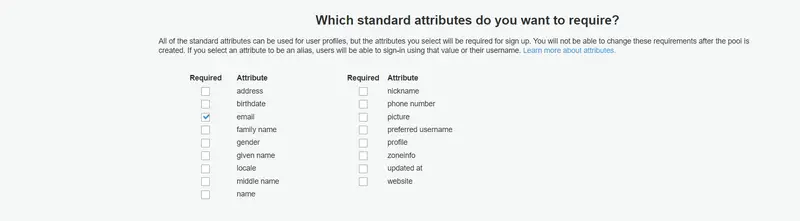
In the ‘Attributes‘ section, you can specify how users will sign in – whether with their email address, phone number, username, or preferred username, along with their password. We have left the configurations to the default setting, where an email address is required for sign up.
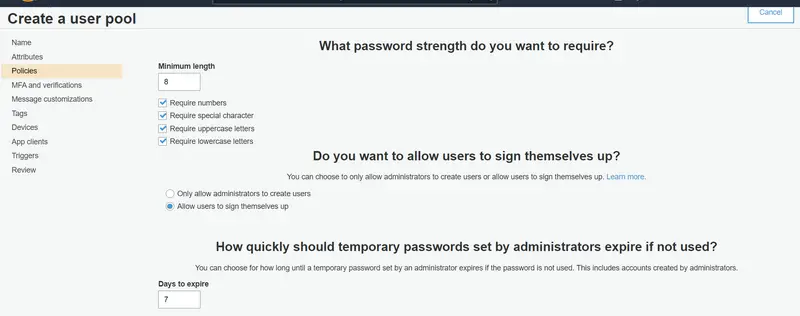
In the Policies section, you can define policies like Password Strength, Creation of Users, and Expiration of Temporary Passwords. For now, we will keep all these things to default.
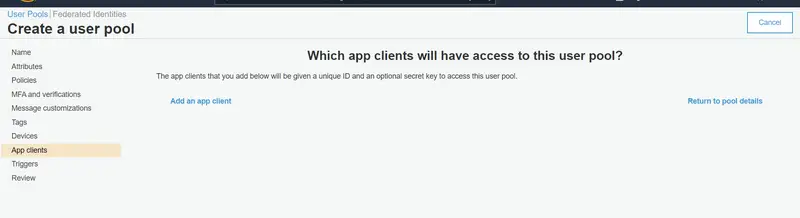
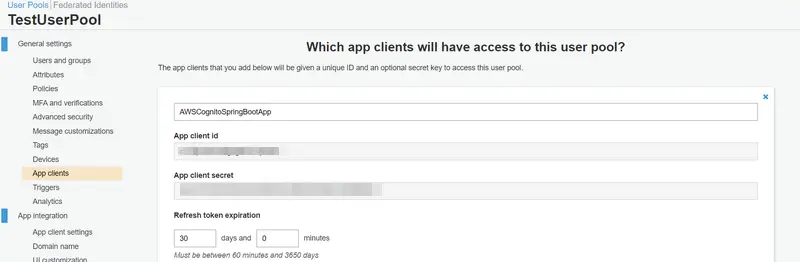
Now we will go to the App Client section and click on Add an app client as shown in the picture.
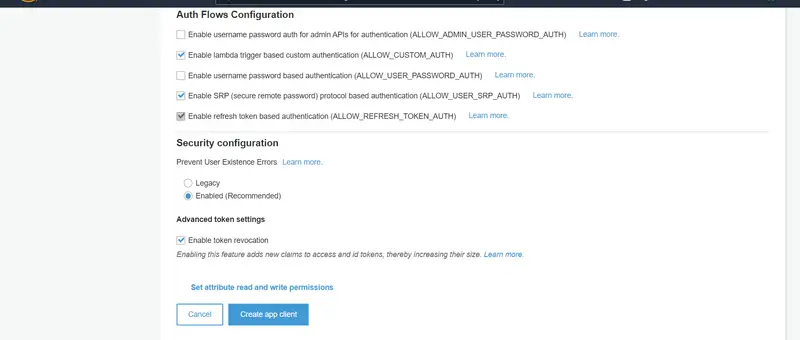
Now provide the App client name. Here you can set details like Refresh token expiration, Access token expiration, and ID token expiration time along with Auth Flows Configuration and Security configuration. We will keep all the mentioned configurations to default and click on Create app client. After the creation of App Client, you will be given a unique ID and a secret key to access this user pool.

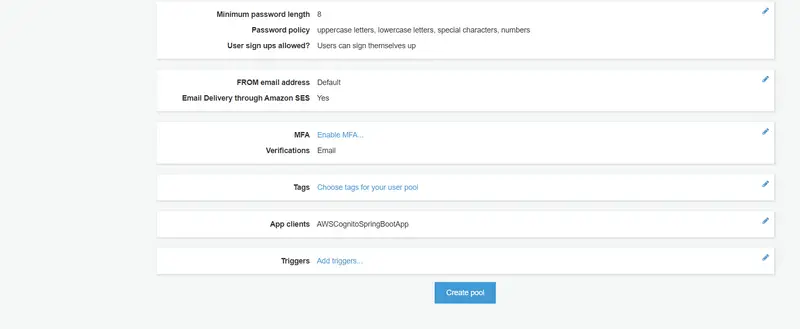
Now go to the Review section and after reviewing the configurations, click on Create pool.
Additional Configuration
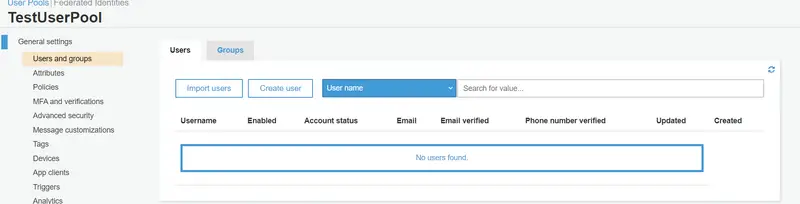
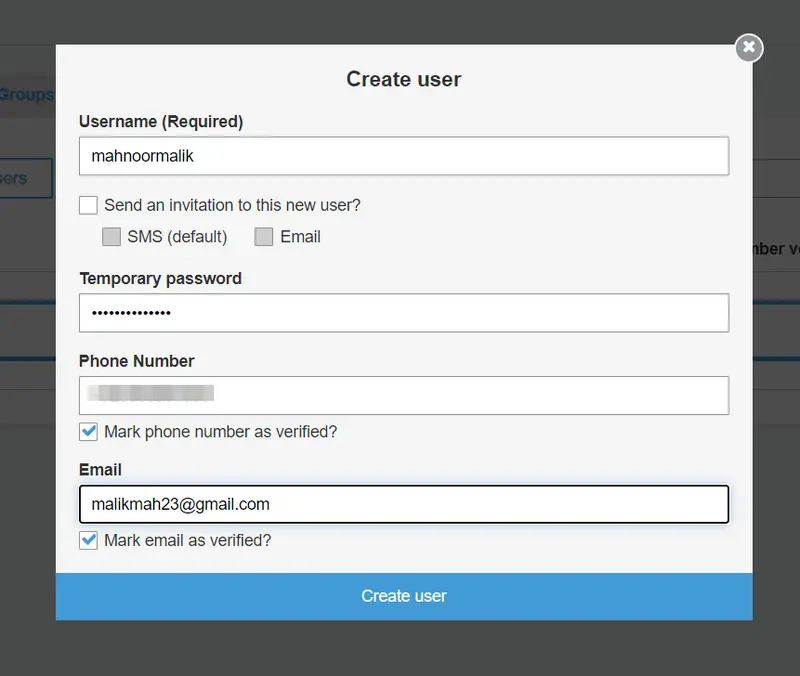
After creating a user pool, additional options will be available in the left pane for configuration. Navigate to the Users and Groups section and click on ‘Create User.’ Currently, there are no users created for our Spring Boot application.
Now provide the details of the User that include Username, Temporary Password, Phone number, and Email. Uncheck Send an invitation to this new user and then click on Create user.
From the left pane, go to the App Clients section. Here you can see the App client id which we will use later while configuring our Spring Boot Application. After clicking on Show details, you can also view the App client secret that will also be used while configuring our Spring Boot Application.
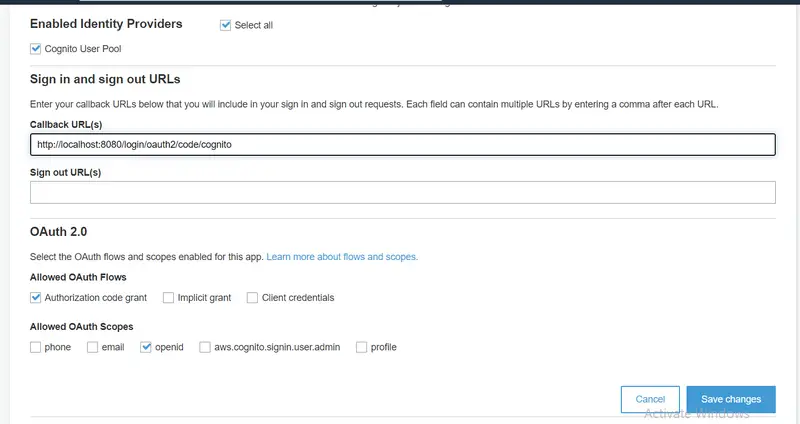
Now from the left pane, go to the App client settings under App Integration and check Enable Identity Providers. Provide the Callback URL and check Authorization code grant and openid under Allowed OAuth Flows and Allowed OAuth Scopes respectively and then click on Save changes.
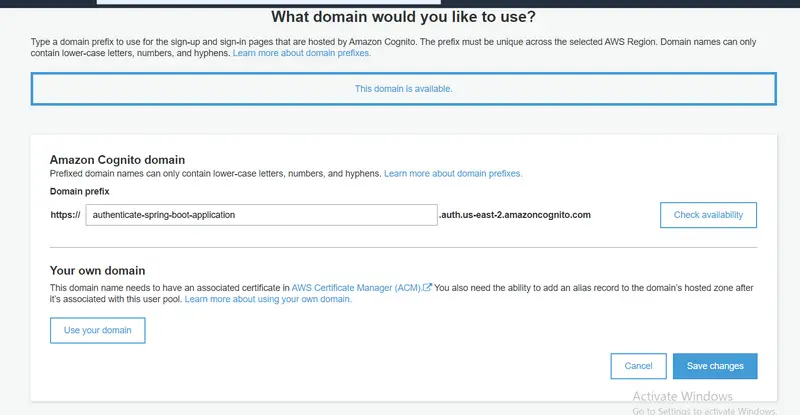
Now from the left pane, go to the Domain name section and enter a domain prefix to be used for the sign-up and sign-in pages that are hosted by Amazon Cognito, and then click on Save changes.
With this, we have come to the end of our Amazon Cognito setup. Now we will move to our Spring Boot Application.
Integration of Amazon Cognito in Spring Boot Application
application.properties
This is our application.properties file. Note the following points.
- client-id will be equal to the client id value in App Clients under General settings.
- client-secret will be equal to the client secret value in App Clients under General settings.
- redirect-uri will be equal to Callback URL in App client settings under App integration.
- clientName will be equal to the name which you entered while creating the app client. You can find it in App Clients under General settings.
- In issueUri, region will be equal to the region you are currently working in. You can find it in General Settings.
- In issueUri, Pool Id will be equal to the Pool Id value in General Settings.
spring.security.oauth2.client.registration.cognito.client-id = xxxxxxxxxxxxxxxxxxxx
spring.security.oauth2.client.registration.cognito.client-secret = xxxxxxxxxxxxxxxxxxxxxxxxxxxxxxxxxx
spring.security.oauth2.client.registration.cognito.scope = openid
spring.security.oauth2.client.registration.cognito.redirect-uri = http://localhost:8080/login/oauth2/code/cognito
spring.security.oauth2.client.registration.cognito.clientName = AWSCognitoSpringBootApp
spring.security.oauth2.client.provider.cognito.issuerUri = https://cognito-idp.{region}.amazonaws.com/{Pool Id}
spring.security.oauth2.client.provider.cognito.user-name-attribute = cognito:username
pom.xml
This is the pom.xml for our Spring Boot Application that contains the necessary dependencies.
<?xml version="1.0" encoding="UTF-8"?>
<project xmlns="http://maven.apache.org/POM/4.0.0"
    xmlns:xsi="http://www.w3.org/2001/XMLSchema-instance"
    xsi:schemaLocation="http://maven.apache.org/POM/4.0.0 https://maven.apache.org/xsd/maven-4.0.0.xsd">
    <modelVersion>4.0.0</modelVersion>
    <parent>
        <groupId>org.springframework.boot</groupId>
        <artifactId>spring-boot-starter-parent</artifactId>
        <version>2.5.6</version>
        <relativePath /> <!-- lookup parent from repository -->
    </parent>
    <groupId>com.library</groupId>
    <artifactId>aws-cognito</artifactId>
    <version>0.0.1-SNAPSHOT</version>
    <name>aws-cognito</name>
    <description>Project for Amazon Cognito</description>
    <properties>
        <java.version>11</java.version>
    </properties>
    <dependencies>
        <dependency>
            <groupId>org.springframework.boot</groupId>
            <artifactId>spring-boot-starter-security</artifactId>
        </dependency>
        <dependency>
            <groupId>org.springframework.boot</groupId>
            <artifactId>spring-boot-starter-web</artifactId>
        </dependency>
        <dependency>
            <groupId>org.springframework.boot</groupId>
            <artifactId>spring-boot-starter-thymeleaf</artifactId>
        </dependency>
        <dependency>
            <groupId>org.thymeleaf.extras</groupId>
            <artifactId>thymeleaf-extras-springsecurity5</artifactId>
        </dependency>
        <!-- oauth2 -->
        <dependency>
            <groupId>org.springframework.security</groupId>
            <artifactId>spring-security-oauth2-client</artifactId>
        </dependency>
        <dependency>
            <groupId>org.springframework.security</groupId>
            <artifactId>spring-security-oauth2-jose</artifactId>
        </dependency>
        <dependency>
            <groupId>org.springframework</groupId>
            <artifactId>spring-test</artifactId>
        </dependency>
        <dependency>
            <groupId>org.springframework.boot</groupId>
            <artifactId>spring-boot-starter-test</artifactId>
            <scope>test</scope>
        </dependency>
        <dependency>
            <groupId>org.springframework.security</groupId>
            <artifactId>spring-security-test</artifactId>
            <scope>test</scope>
        </dependency>

    </dependencies>

    <build>
        <plugins>
            <plugin>
                <groupId>org.springframework.boot</groupId>
                <artifactId>spring-boot-maven-plugin</artifactId>
            </plugin>
        </plugins>
    </build>

</project>
SecurityConfiguration.java
Following is the security configuration file.
import org.springframework.context.annotation.Configuration;
import org.springframework.security.config.annotation.web.builders.HttpSecurity;
import org.springframework.security.config.annotation.web.configuration.WebSecurityConfigurerAdapter;

@Configuration
public class SecurityConfiguration extends WebSecurityConfigurerAdapter {

    @Override
    protected void configure(HttpSecurity http) throws Exception {
        http.csrf()
            .and()
            .authorizeRequests(authz -> authz.mvcMatchers("/")
                .permitAll()
                .anyRequest()
                .authenticated())
            .oauth2Login()
            .and()
            .logout()
            .logoutSuccessUrl("/");
    }
}
AmazonCognitoWebConfiguration.java
This is the file from where we will call our Home page.
import org.springframework.context.annotation.Configuration;
import org.springframework.web.servlet.config.annotation.ViewControllerRegistry;
import org.springframework.web.servlet.config.annotation.WebMvcConfigurer;

@Configuration
public class AmazonCognitoWebConfiguration implements WebMvcConfigurer {

    @Override
    public void addViewControllers(ViewControllerRegistry registry) {
        registry.addViewController("/").setViewName("home");
    }
}
home.html
<!DOCTYPE html>
<html xmlns:th="http://www.thymeleaf.org"
    xmlns:sec="http://www.thymeleaf.org/extras/spring-security">
<head>
<meta charset="utf-8">
<meta name="viewport" content="width=device-width, initial-scale=1">
<title>OAuth2 Cognito Demo</title>

<link rel="stylesheet"
    href="https://cdnjs.cloudflare.com/ajax/libs/bulma/0.7.4/css/bulma.min.css">
</head>
<body>
    <section class="section">
        <div class="container has-text-centered">
            <div>
                <h1 class="title">AWS Cognito Spring Security Demo</h1>

                <div sec:authorize="isAuthenticated()">
                    <div class="box">
                        Hello, <strong th:text="${#authentication.name}"></strong>!
                    </div>
                </div>

                <div sec:authorize="isAnonymous()">
                    <div class="box">
                        <a class="button login is-primary"
                            th:href="@{/oauth2/authorization/cognito}">Log in with AWS
                            Cognito</a>
                    </div>
                </div>
            </div>
        </div>
    </section>
</body>
</html>
Testing
After running the Spring Boot Application, go to http://localhost:8080 and click on Login with AWS Cognito.

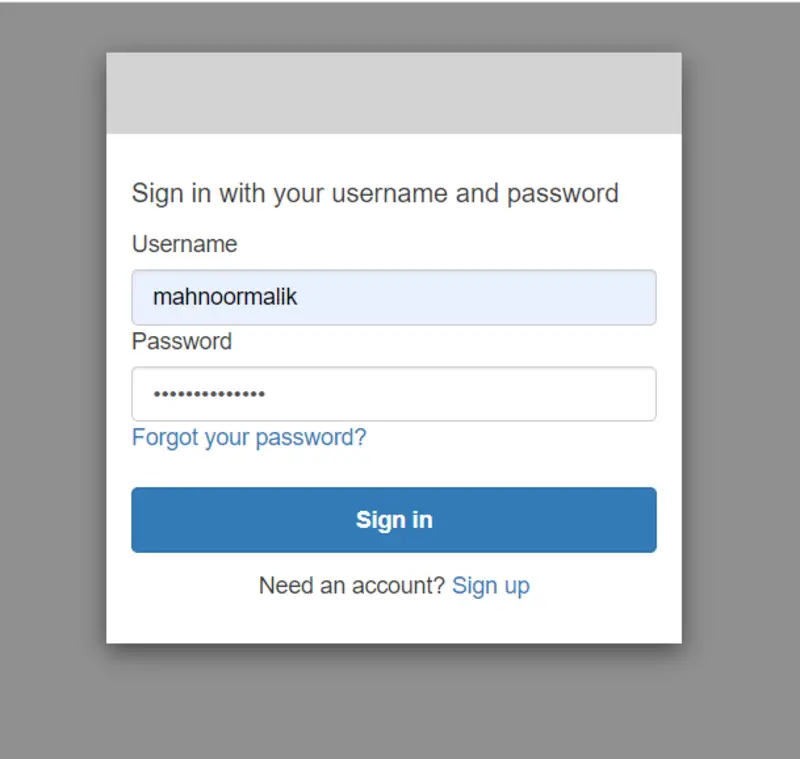
Enter username and password provided by the administrator.
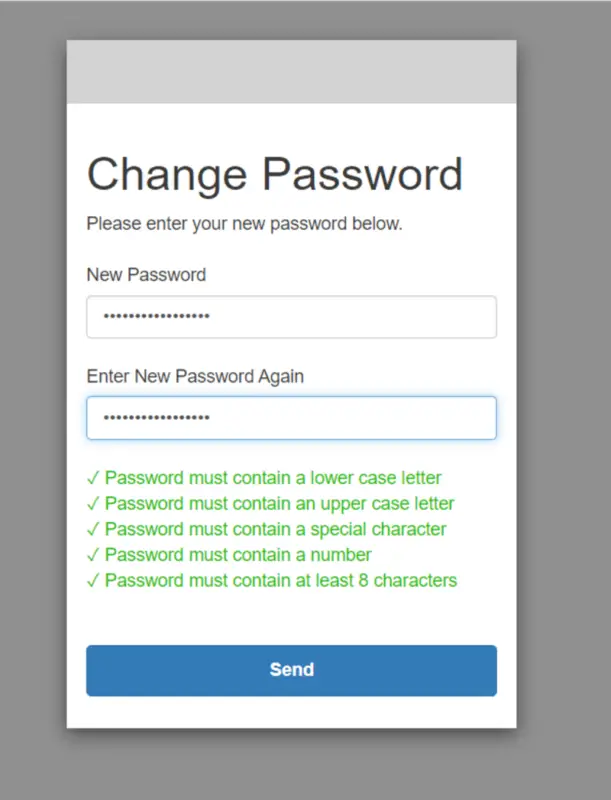
Since you are logging in for the first time, you will have to update your password as the password was previously set by the administrator.
Now you will be able to successfully login into your Spring Boot Application.

Conclusion
In this tutorial, you learned about user authentication with Amazon Cognito in a Spring Boot application, and I walked you through the process of setting up Amazon Cognito from scratch. You’ve also learned how to integrate it into a Spring Boot application.
Feel free to give any feedback in the comments section. Stay tuned for other AWS tutorials coming ahead.
Happy Learning!